• working on DNS.. links may break temporarily.

Pizza Oven and BBQ Build Thread

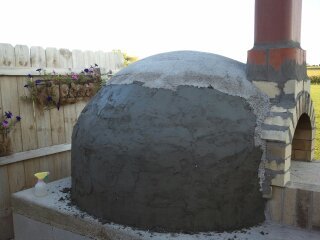
The "render" process where a protective coating is done over the fragile dome insulation.
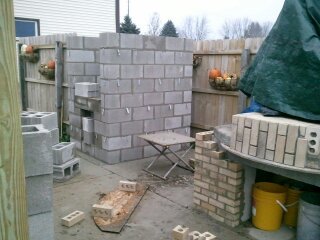
Although the finishing components of the oven are complete and it is fully functional by this point, we began work on the brick smoker and Tuscan grill
*We were using it almost daily and didn't want to interrupt the food experiments...
A minimum of two more render coats will be applied when the weather warms.
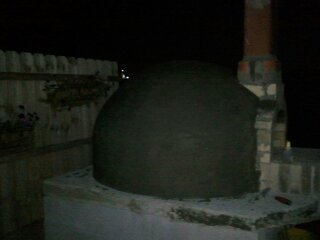
Some of the progress we made before the freezing weather began...
More of the "before freezing" photos to come.
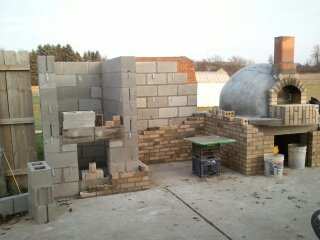
 

Attachments

  • pizza oven 075.jpg
    pizza oven 075.jpg
    14.2 KB · Views: 558
  • pizza oven 078.jpg
    pizza oven 078.jpg
    9.3 KB · Views: 557
  • pizza oven 093.jpg
    pizza oven 093.jpg
    20.3 KB · Views: 557
  • pizza oven 094.jpg
    pizza oven 094.jpg
    16.8 KB · Views: 557
Nice work! Did you draw any information for plans from Forno Bravo? I've spent some time on their site and downloaded their build plans. Definitely have to build one some day!
 
That is a great site, I did not get their plans (was never a real plan) there but did get some basic dimensions and ideas from other builds on there.
Mine is a hybrid between a Pompeii and a Neapolitan style.
I wanted the larger inner diameter with a lower dome height. As it turned out, it is a great compromise for both bread baking, general cooking, and pies (pizza).
 
Same here, I looked over the plans just to get the basic idea and principle behind the build. All other design ideas and build technique, including choice of materials came from reviewing the dozens of build threads on that site. Every brick oven build is different.
 
...Every brick oven build is different.

That's one of the things that intrigues me about these. You get information so you have an idea on the theory and techniques, then make one that is your own, both from the functional and style aspects.
 
Functionality and durability are key, engineer it correctly.
It is only masonry, so yes you "figuratively speaking" polish a turd...
Or build a "house" (enclosure) over it.

Carbon, Would love to see a shot of you finished unit, please??
 
Carbon, Would love to see a shot of you finished unit, please??

Sure thing. This nook behind the kitchen used to be my BBQ area before I decided to build the oven there in that corner three years ago.

P1050422_zpsa6022863.jpg


P1050697_zps9dc49102.jpg
 
Wow! Beautifully finished, I hope mine looks half that nice when it is done!
Cool how you ran the flue up the center, that takes some engineering to make it work correctly.

What did you render with? It looks pretty thick, especially over the dome and up the flue. Is it painted?

I see you also have a turning peel-very handy tool. I really like the small wood peel, I'll have to look for one like that.
Smart also to incorporate a prep/staging deck as well.

Very, very nice build!!
 
That is really cool. I wish I had the skills to do that. I have the base for one on my outdoor kitchen but I think I'm going to have to buy one from Forno Bravo. I don't have the confidence or skills it would take to do it myself.
 
You may want to consider having one built before committing to a kit. Not that they are necessarily inferior, (most all of the commercial WFO's are commercially build) just a better value-plus the personal attributes-IMHO.

Either way, they are worth it. So much so you may find yourself selling the kit unit after the first year and having one built.
 
Absolutely awesome build brother ...

When you get done, I'll send you my address so you can build mine.
 
What did you render with? It looks pretty thick, especially over the dome and up the flue. Is it painted?

I see you also have a turning peel-very handy tool. I really like the small wood peel, I'll have to look for one like that...

Thanks! I chicken wired over the ceramic blanket covering the entire dome, top to bottom, and applied a couple of layers of stucco base coat. Then over that I used vermicrete to mold and give shape to the entire dome. For final coat I applied several layers of SBC (surface bonding cement), a waterproof fiber embedded stucco finish in white.
I used refractory cement to mold that front vent in the pic.

As for the aluminum turning peel, I made that out of a cheap, large aluminum peel, trimmed it down to size, and replaced the wooden handle with 3/4" copper pipe. The wood turning peel was originally a regular large peel as well which I trimmed and finished to desired size.

P1040642_zpsb6e8ef54.jpg


P1040670_zpsd0146d07.jpg
 
Very nice. Must have been kind of PIA working around the back? I know I would not fit in there...
Very clean work space as well, seemed like we never got ahead of the clean-up.

Whose waterproof fiber embedded stucco did you use?

I have looked at many a peel, hence my question(s). Mad skills!
I was lucky enough to have the beautiful peel (shown in a previous photo) give to us as a gift from a friend and neighbor who's father in law does woodworking as a hobby...
My current turning peel is a "prototype" of sheet metal welded to a piece of conduit...
Replacement will be Stainless. I will likely copy your smaller one. :)
 
Thanks, that is the same type of product (different mfg) I applied for the first three coats.
It looks like the Quickrete product is much more forgiving when applying in thicker layers...
 
Back
Top