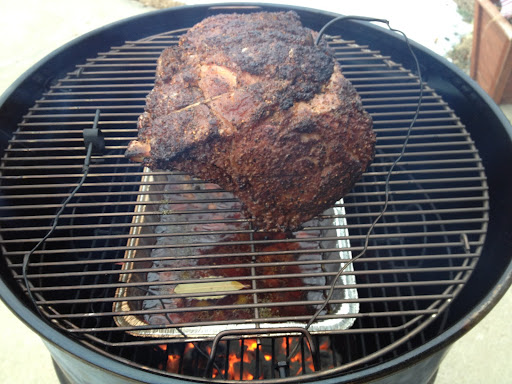
• working on DNS.. links may break temporarily.
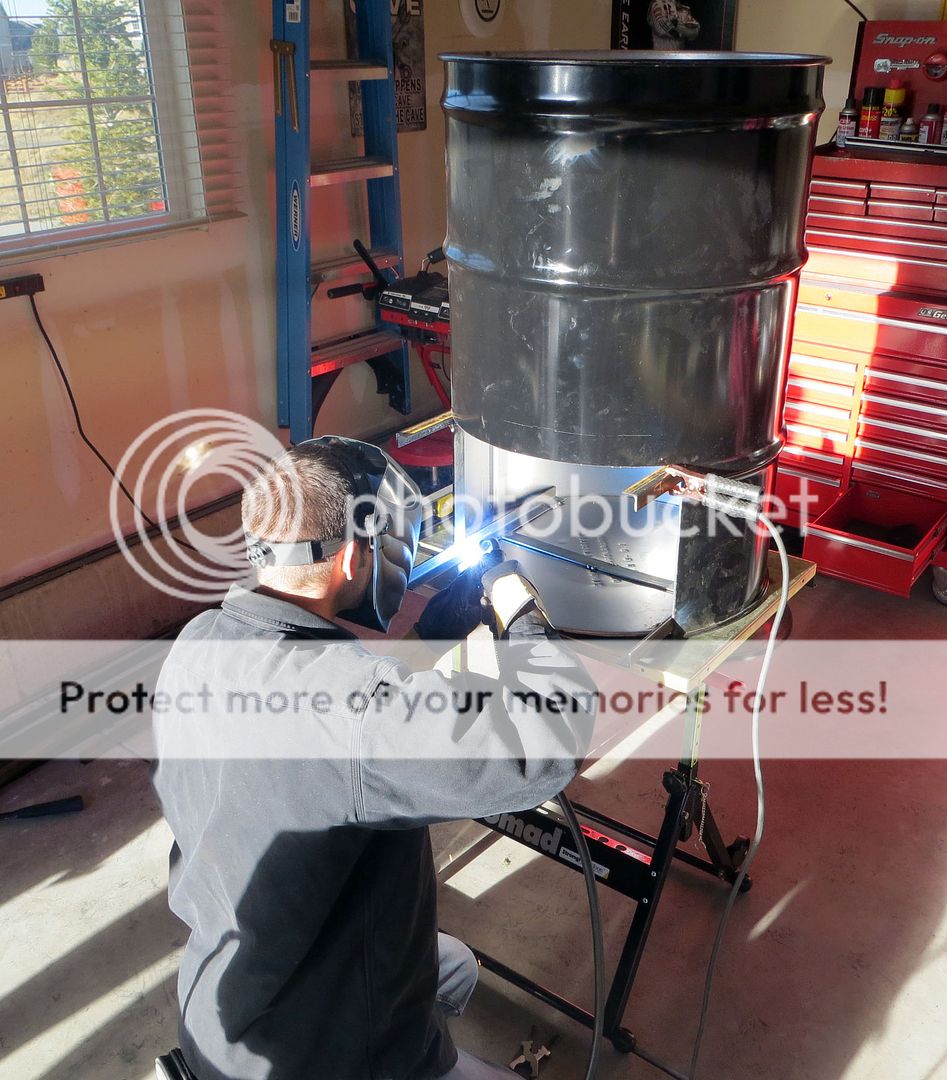
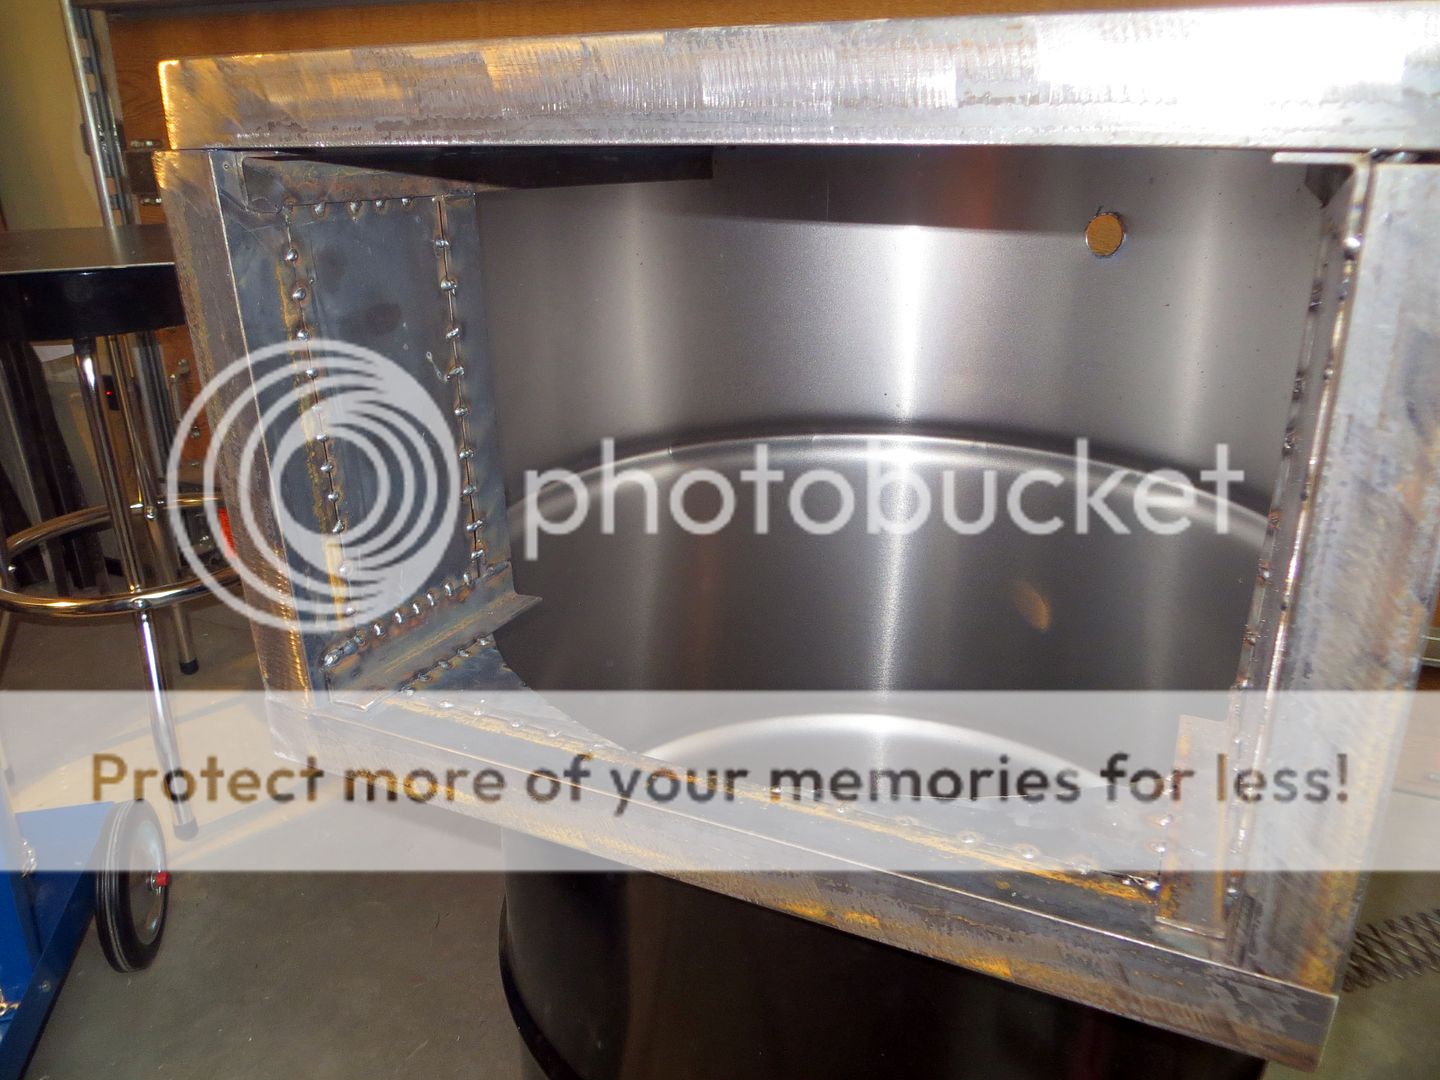
It's getting there ...

IMG_00126.jpg


IMG_00127.jpg


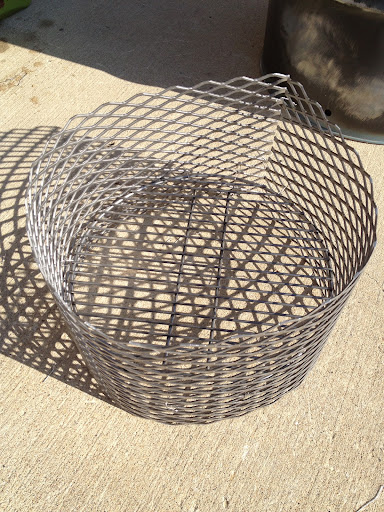
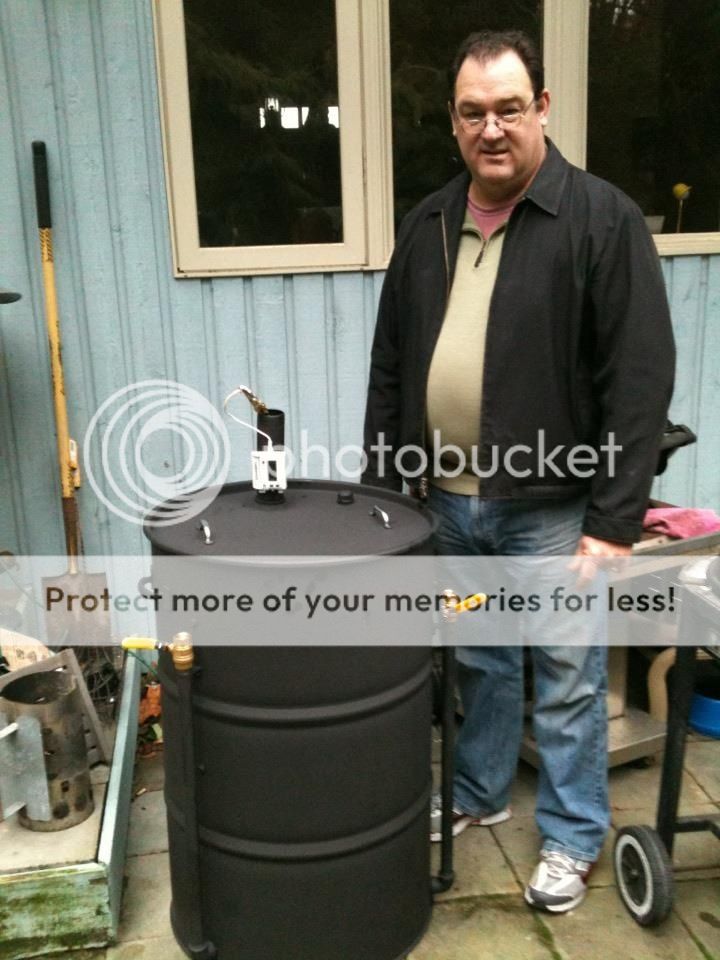
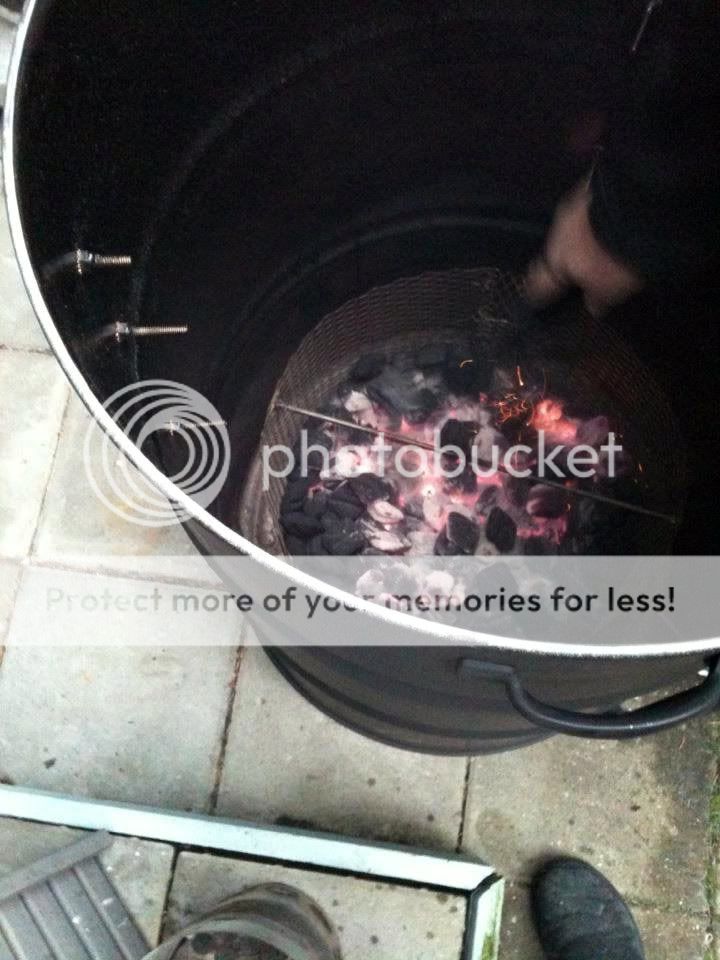
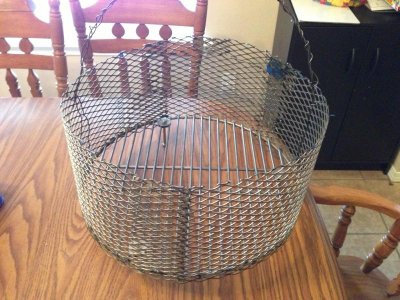
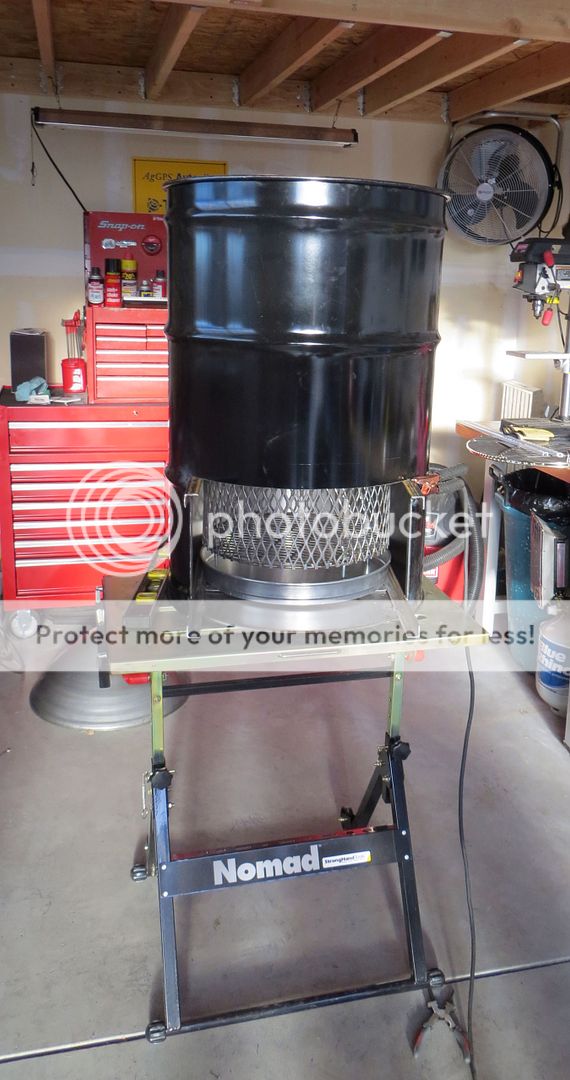
Basket needs a little more work, and I have a wire handle for it somewhere around here. Lid is in the process of being drilled (battery died again), and I do have a weber kettle lid I'll be using eventually. Will be seasoning tonight, and smokin' tomorrow ...
 
Okay, I'm a newbie to this site and have become addicted to reading through the many posts on this thread. Lot's of great info, but my ADD is kicking in and I'm wondering about the holes that are drilled into the base of the barrel. They are obviously for air flow, but do you need a valve on each hole? Or do you only only need a valve on one of the holes.
 
Rob that Police UDS is great. What did you use for the handle, a blue gun? I love it. great work
 
Okay, I'm a newbie to this site and have become addicted to reading through the many posts on this thread. Lot's of great info, but my ADD is kicking in and I'm wondering about the holes that are drilled into the base of the barrel. They are obviously for air flow, but do you need a valve on each hole? Or do you only only need a valve on one of the holes.

If was going to build another one...I would not use the valve I would use pipe fittings on all three. I seem to always leave it wide open to keep my temp at. 235-250 ish just my 2c

My name is Mike and I approved this message
 
At Mason Dixon Bowhunta. You only need the ball valve on one intake. The first uds I built I used four 1/2 pipe nipples and I used a regular gate valve that is used on waterhose applications and to be I can keep it around 240 degrees just by using the caps on or off with the valve completely open. The next drum I built I got the drum from a friend with the holes drilled for 1/2 nipples but he messed up the hole spacing so there was a larger gap between one set of holes. I drilled a 1 inch hole in the middle of that space that space and installed a 3/4 nipple with a ball valve. That drum sometimes I leave one nipple off and regulate the airflow with the valve and sometimes I just use the valve with all the nipples capped depending on weather conditions. I believe that if a guy was on a low budget he could put in six equally spaced 1/2 nipples and regulate the temps just using the caps on or off a few nipples.
 
Drums_zps888540c8.jpg


My original black drum with ribolator/weber extension ring next to the new burnt copper with black accents.
 
... Lot's of great info, but my ADD is kicking in and I'm wondering about the holes that are drilled into the base of the barrel. They are obviously for air flow, but do you need a valve on each hole? Or do you only only need a valve on one of the holes.

I have one 3/4" and three 1" holes and will regulate intake airflow using refrigerator magnets. No nipples or valves needed. K.I.S.S. (life is too complex; q is for relaxing)
 
thanks Ed. Just out of curiosity, why is one of the holes 1/4" smaller than the others?

Mine is modeled after a drum I used that just used aluminum foil to plug/unplug intake holes as needed. I thought with just one 3/4" hole it'd cruise low(er) and slow. The more I think about it, the more I like the idea of fridge magnets, so they could all be larger. I'm gonna keep the one 3/4" anyhow.
 
After thinking about building one of these for years I finaly did it, but I didn't do it for me.

Gave it to dad for christmas.

C0B4B331-3E20-4603-9518-F7F1A8B3B386-757-00000131CC8629C5.jpg


Even after reading how stingy they are with fuel I was shocked to see how little it used.

This is after burning full blast with all three vents open (dont know temp, my therm was pegged at 500) for 3 hours, 350 or so with only two open for another 3 hours, then closed all but one and let it go all night (midnight to 8am) it was 235 when I went to bed and 197 when I checked it at 8. Total burn time of 15 hours.

We had 2/3rds of our kingsford left.
CD95CD89-7AD5-4055-8473-19638F867BE2-757-00000131E36C7630.jpg


And the christmas pig was cooked on it.
1952784F-713A-4823-919A-5431793D8011-757-00000131F86B6E5A.jpg
 
  • Thanks
Reactions: gtr
I just completed my UDS this morning (would have been done yesterday, but I was short a bolt), and I wanted to add pics of my UDS to this thread.

Honestly, without all the great help in this thread I don't think I would have had as easy of a time as I did putting this together. Thanks everyone :thumb:
 

Attachments

  • 2012-12-28 10.36.36.jpg
    2012-12-28 10.36.36.jpg
    42.5 KB · Views: 683
  • 2012-12-28 09.05.54.jpg
    2012-12-28 09.05.54.jpg
    98.2 KB · Views: 685
Fired up my new build for standing rib roast today ...

IMG_00133.jpg


IMG_00134.jpg


Took it to 126 internal, rested while au jus was cooking, then seared in high oven. Probably could have cooked it a litte longer, but it all pretty much disappeared this evening ...
 
I'm just guessing, but maybe he wants a stick burner at times.
 
Just wondering why all this extra work? It's super cool but.....

I like access and adjustability. Starting the fire and dropping it in from the top and not being able to make any "adjustments" if needed is not a good idea too me. With a standard UDS, you have to remove your grates, meat, thermos, etc. if you need to get to the fire. Big PIA IMO.

Advantages:
1. Start the fire outside, slip it through the door. Easy.
2. If there is any adjustment needed for the fire, simply open the door and access the fire basket.
3. Need to add chips? Open the door, pull out the basket and add.
4. Need to stoke the fire, open the door, pull out the basket.
5. Too hot? - Pull out the basket.
6. Need to add charcoal or bring the heat up fast, simply open the door.
7. Clean out, open the door and wash out.

I have the time, tools and skills, why not? This feature makes the UDS a simpler, convenient and more practical smoker to me with access to the fire basket at any time.

This is my 5th BUFORD build and the adjustability and functionality is awesome.
 
Back
Top