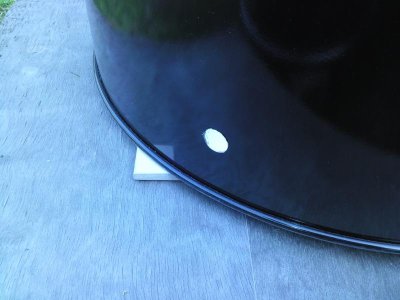
It's a lot easier with a scroll saw with a metal cutting blade if you have one. I cut inside the rim, keep it tight against the rim and you get a clean cut. you won't be able to re-use the lid as a top.
 
so there is no way to reuse the lid no matter how you cut it? I dont have any saws and only the hammer and chisel to cut with. If I want to use the lid, how do I? Get someone to cut it off for me?
 
so there is no way to reuse the lid no matter how you cut it?

He's implying that it will no longer be wide enough to cover the hole.
Cut it off and use a Weber or Weber knockoff 22-1/2" grill lid.
Or a 22-1/2" wok (google it, they exist).
Or something else made of metal big enough to cover the hole.

Use your imagination -- if you don't have the tools or the materials or the cash, it's by far your best ace in the hole. :wink:
 
Originally Posted by MariettaSmoker
so there is no way to reuse the lid no matter how you cut it?

not that I have read on here.
look on craigslist for a 22.5 weber kettle. you get the lid, charcoal grate and cooking grate(if it's in good shape) all for one price. I paid $25 for one and others have paid less or found free ones.
 
Were did all the pics go?

Hey there again brothers in smoke, :-D

I am really enjoying all the info and tips on this thread.

Up to page 150 of the UDS epic and have another question.

WHere did a whole lot of the pictures go?:confused:

Lots of folks have said they have posted a pic and there is a little square that says the picture is no longer available. :sad:

What's up? :icon_smil Looks like this thread was started three years ago but there's a lot of pictures missing.

Not fussing, just wondering about all the great pics I'm missing out on.

Thanks
 
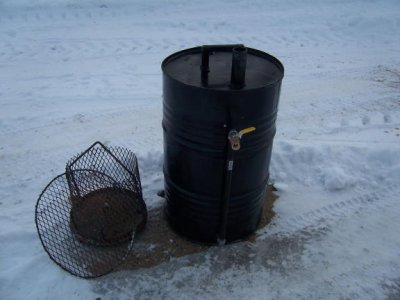
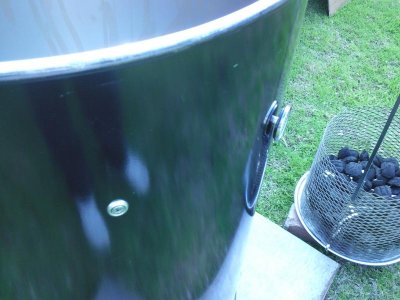
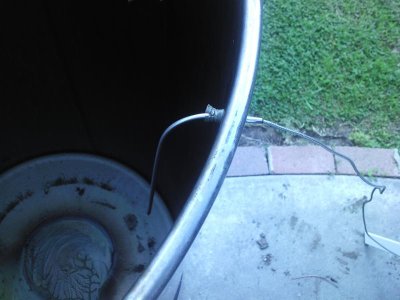
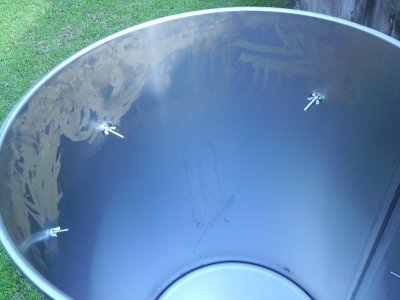
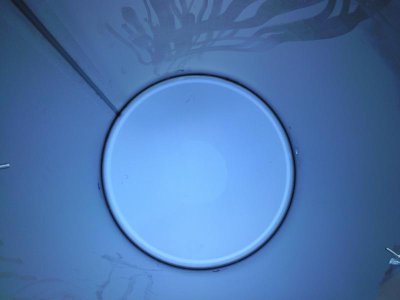
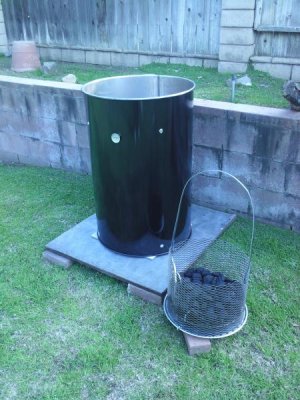
My first UDS. I got the barell from a place that refinishes them,no liner.I welded a 1/8 by 3/4 inch band of steel around the top inside edge leaving 1/2 inch sticking up to fit the Weber lid. I welded the entire wheel assembly from a Weber to the bottom. I made a 2 inch id carburator style air intake,works well. The grill supports are 1 1/2 inch pieces of angle weled to the barell. Thanks for all the tips on this forum..Here's a link to some pictures...http://picasaweb.google.com/mikehanson0/Uds

That looks so much easier and useful than the previous trend.
 
Hey there again brothers in smoke, :-D

I am really enjoying all the info and tips on this thread.

Up to page 150 of the UDS epic and have another question.

WHere did a whole lot of the pictures go?:confused:

Lots of folks have said they have posted a pic and there is a little square that says the picture is no longer available. :sad:

What's up? :icon_smil Looks like this thread was started three years ago but there's a lot of pictures missing.

Not fussing, just wondering about all the great pics I'm missing out on.

Thanks

I hear ya man, but sometimes I skipped some of the banter, I read the PIKTURS!! hahaah
 
I'm just a quiet reader in the background but wanted to thank you all for the enormous amount of info i get here..

Jan Willem
 
Hey there again brothers in smoke, :-D

I am really enjoying all the info and tips on this thread.

Up to page 150 of the UDS epic and have another question.

WHere did a whole lot of the pictures go?:confused:

Lots of folks have said they have posted a pic and there is a little square that says the picture is no longer available. :sad:

What's up? :icon_smil Looks like this thread was started three years ago but there's a lot of pictures missing.

Not fussing, just wondering about all the great pics I'm missing out on.

Thanks


Most of the pictures aren't stored here, they're uploaded to a picture sharing site like photobucket, flickr or whatever else. A lot of those accounts have auto-shut off for dormant accounts, so if the person who uploaded the pictures hasn't logged in to the photosharing site in a while, the account will stop hosting pictures. Or the person could have deleted the pictures from the photosharing site as well.

It can be annoying on older threads, can't it?

Suggestion: try PMing the person at bbq-brethren who wrote the post that had the pictures you want to see. They may be able to get them to you.
 
I think somewhere, someone made a tall barrel by using a cutoff saw to cut a barrel at the flare, then clamping it to bottom lip of the second barrel. The tall barrel had room for extra racks.

Another person did put the cutout of a top to good use - by making it into a diffuser plate on the bottom of the drum. They were using a bottom draft hole rather than the traditional 3 pipe nipples.
 
Ok, first post here. After reading all the info here on UDS, I got around to building mine. I had to drive 6 hours to get my food grade barrel and had to make everything, which was ok. I got some ribs on it as we speak. Again, thanks to all who helped me get a bit smarter.
 

Attachments

  • Smoker.jpg
    Smoker.jpg
    37.9 KB · Views: 938
I'm seasoning mine right now. Its 42 degrees. Have had some issues getting set into a temp been anywhere from 210 to 260 and now back to 210. Hoping to get it dialed in and let it run.

Have to feed people on sunday!
 
Greetings Brethren!!! Just finished this epic thread just in time for dinner off my brand new UDS lol!

Been reading for quite some time... started collecting parts about post 2000, started assembly by 3000, did my burn about 4000.... yes I got impatient.

But I have absolutely no, zero, nada, zilch questions.

KISS was the rule of thumb. Did everything new and in stainless. Haven't added any bling, wheels, exhaust pipes, or other such extravagance.... yet.

I got a Brand NEW 55 Gallon Open Top Drum with no linear and no anti rust spray from a local place in Los Angeles, CA that refurbishes drums (Industrial Container Service). For $65 instead of $20, I saved the hassle of linear removal, buying a weed burner (even though I shop at HF once a week), locating/transporting pallets, and pissing off the neighbors or getting a visit from the local fire dept. Good investment IMHO. I picked a barrel with straight sides instead of ribbed though (gotta a car door magnet from VistaPrint on order for FREE)

The top of my lid has the 8 exhaust ports for ideal convection uniformly spaced and 1/2 inch in diameter. It is worth noting at this point that I used the 3 Pack of Smooth Step Bits from HF which have two - 1/2 inch and one 3/4 inch steps. I used the charcoal grill from the firebox for a template for my ring on the lid.

I went with Four 3/4 in intakes 2 inches from the bottom of the barrel.
Magnets are cheap and plentiful. In fact I have so many if anyone needs some send me a PM.

I went 6 inches from the top to add 4 stainless steel 2 in machine screws with wing nuts and finishing caps from Lowes.
This gives me approximately the 24 inches from the Bottom of my firebox to the grill.
My Grill is an original replacement Weber 22.5 inch SS grill also from Lowes.
None of the big box stores or home improvement shops have expanded metal but the guys at True Value hooked me up with a local fabricator/welder who was able to cut me scrap metal for the firebox, I tipped him a $20 for his time and scraps.

The Firebox is 11 inches high and wraps all the way around an 18 in replacement Weber charcoal grill. I raised the charcoal grill to 3 inches instead of 2 after my first test burn because I was getting a lot of ash but it's easy to adjust as the entire firebox is held together with Stainless Steel Zip Ties from HF again. That was my favorite tip in the entire thread - to use those SS Zip Ties. The reason I went 11 inches high for the expanded metal was so I could SS zip tie the mesh to my pizza dish Ash Catcher after drilling 4 holes in the dish.

That's it in a nutshell. Post picts as proof of life when the wife gets home with the camera... that is if I'm not too busy eating...

Cheers.

UPDATE:
added pictures.
Couple of notes... some surface rust where my fingers left their dew... burned it, tide, towel dry, lard, cured.
Firebox with charcoal sat at 2 inches above pizza pan.
Firebox with lump is at 3 inched up.
The meat probe goes through a coax end that was left over from a cable TV install... looking for something better but for now just wanted to get the probe off the wall.
Last pict is a 6.5 lbs Picnic, temp 1 in below grill hovered around 225 for 7 hours and internal temp hit 189 before my wife yelled at me to serve up dinner. Took it off, wrapped in foil, stalled for an hour, sliced and served.
 

Attachments

  • CC Firecircle.jpg
    CC Firecircle.jpg
    79.9 KB · Views: 899
  • CC Firecircle w lump coal.jpg
    CC Firecircle w lump coal.jpg
    43.5 KB · Views: 900
  • CC 7lbs Lump.jpg
    CC 7lbs Lump.jpg
    83.4 KB · Views: 902
  • CC Finishing Washer.jpg
    CC Finishing Washer.jpg
    63 KB · Views: 901
  • CC Mavrick insert.jpg
    CC Mavrick insert.jpg
    48.8 KB · Views: 897
  • CC surface rust.jpg
    CC surface rust.jpg
    43 KB · Views: 896
  • CC Bottom o Barrell.jpg
    CC Bottom o Barrell.jpg
    23.7 KB · Views: 901
  • CC Intake.jpg
    CC Intake.jpg
    50.2 KB · Views: 902
  • CC UDS.jpg
    CC UDS.jpg
    58.6 KB · Views: 898
  • pork picnic 4.jpg
    pork picnic 4.jpg
    59.4 KB · Views: 897
Last edited:
Oh my gosh this thread is long. I read it and took notes. I already have my 3/4 nipples ball valve and caps. Just need a Drum and all the other odd bits and I will be able to start building. Nothing fancy here just the basic tried and true build.
 
CmdCtr, nice build and that is a great summary of the thread. Where in LA is the place you got the barrel?

Thx
 
Now that is how it's supposed to be done. Do it right the first time and you won't have any questions. Nice work.
 
Smoke Brothers a consensus please….

I'll try to redo the message it didn't display correctly.
 
Last edited:
Back
Top