Got my new drum yesterday :becky: ... so I'm going to begin assembling my UDS this weekend.
I've taken a ton of notes from this forum and i'm ready to start. I'm sure i'll be popping some questions.


Make sure to post some pics as well!
 
Good idea w/ the bottom of the Weber! Interesting thought. Never thought of using the bottom as a lid. Should work though! I have one that I used the top for Ole Blue, so maybe on the next one, I just may give it a shot! Hope it works out!
 
BlkJeep, I like the idea of using the bottom part of a weber as a lid, seems taller than the top part of the weber. I'm still looking for a used weber on CL or Freecycle, so the flat lid will have to do for now. :rolleyes:
 
Not my idea, it was somewhere is this thread. But yes it's a little taller.
 
Got any pics?
Pics are hard for me - they imply a finished product, and my uds has always been simply a work in process.

At the moment it is getting close to being "completed", by the end of this weekend, should be down to a pass through fitting for temp probes, paint, feet/castors, and a bottle opener (probably will pass on that as well, but do have one available). Perhaps I will post some work in process pictures...
 
I have made it to page 61 in the thread and I will finish it over the weekend (maybe). I wanted to post a couple pics of the drum and too thank everyone again. You farkers really saved me a bunch of money on a new smoker.

Here is the UDS in action.

1285850418.jpg


close up

1285850378.jpg
 
My first UDS

Just got my UDS finished and the first smoke under my belt. Everything went well and the wife & I were very impressed. 2 racks of rubbed back loin ribs- 6 hour (hickory) smoke @ 230 degrees (no foil,no turning & no mopping). The ribs turned out GREAT- tender & great flavor. I have a question for you guys with more experience with your drums. The day we fired up the smoker the temp outside was around 85 F and bright sunshine- black smoker in the sun- really had a hard time keeping the temp down- all air vents closed 98% of the time and even had to place a chunk of hickory over about half the stack. Anybody else experience this situation? I've included some pics of my UDS setup. I have since chopped the 8" high stack to about 3.5" inches, thinking that maybe it was drawing too hard. I have (3) 3/4" holes @ 2" from bottom, (2) are magnet covered and one has adjustable raised air intake. I use a Redicheck 2-probe thermometer to monitor meat and center of grate temp.
The pivot feature is for easy clean out.
 

Attachments

  • misc 006.jpg
    misc 006.jpg
    97.8 KB · Views: 715
  • misc 009.jpg
    misc 009.jpg
    88 KB · Views: 716
  • misc 010.jpg
    misc 010.jpg
    87.1 KB · Views: 713
  • misc 011.jpg
    misc 011.jpg
    81.2 KB · Views: 713
  • misc 014.jpg
    misc 014.jpg
    119 KB · Views: 715
  • misc 019.jpg
    misc 019.jpg
    53.7 KB · Views: 712
You shouldn't use the exhaust to try to control temps. Leave it fully open. My guess is you started with to many hot coals. What are you using, bickets or lump? Also, nice looking drum!!:thumb:
 
I've been reading this thread for about three weeks now, while I gather parts for two drums.

Next week I have to cook 100+ lbs of butts in these things for my wife's youth ministry, so I'm running out of time. These guys have to be fabbed by tomorrow so that I can test, season, and of course through on the traditional fatty to christen the drums during the week. I hope that my situation is deserving asking a question even though I am only on page 255.

Regarding fitting Weber tops to the drums - my drums are a bit too wide. I've got a ball pein hammer that I can use to make them a bit wider. Would that be OK vs. a rubber mallet that I see people have used previously?

I've also got a grinder and cutting disks available to go with the kettle band mod. But it looks like those bands get welded, and I have no welding skills (this is actually my first metal working project). If I can do something with drilling holes and perhaps some high temp silicone I wouldn't be afraid of that in the least.

Can a few of the vets out there give me some advice about how to handle the lid in the best manner? If you know of any pics that you can point me to, that would be especially helpful.

I've got one more trip to the hardware store to get a few more bolts tomorrow, so if I need to buy something else I can get it then.

Thanks for sharing all of your advice.
 
How close is teh Weber lid from covering the rim? If you cut off or ground down the lip of the drum would the Weber lid fit then? I guess a metal hammer would work but I prefer to use a double sided mallet that has a harder rubber on one side and a harder plastic on the other.

http://community.craftsman.com/Craftsman-12-oz-Plastic-Tip-Hammer-reviews?tab=details

I could probably grind down the outside of the top lip. I would guess that would take away about 1/2 of the metal. How would this affect the drums strength?
 
Cutting off the lip is a pretty common solution. Look back a few posts to HOPTOAD's build. It looks like he cut off the lip on that drum and the Weber lid fits nicely. Now, if your lid is coming up just shy on covering the lip them use the "beat it with a mallet mod" to flatten the lid and then curve it around the lip of the drum.
 
Cutting off the lip is a pretty common solution. Look back a few posts to HOPTOAD's build. It looks like he cut off the lip on that drum and the Weber lid fits nicely. Now, if your lid is coming up just shy on covering the lip them use the "beat it with a mallet mod" to flatten the lid and then curve it around the lip of the drum.

Looks like I need about 1/4" all around to get over the lip. Is that beatable? And am I flatting out the two bends entirely, and then beating one bend back over the top?
 
You shouldn't use the exhaust to try to control temps. Leave it fully open. My guess is you started with to many hot coals. What are you using, bickets or lump? Also, nice looking drum!!:thumb:
Thanks for the reply. I used KF brickettes & 3 chunks of hickory. I figured that I may have started with too many hot coals (1/2 chimney), but I would have thought after 2-3 hours the temp would have wanted to drop more. I know by reading this forum that the correct way to control the temp is by air intake, but if you've got them all closed after 4 hrs and the temp still wants to climb past 250, then shutting off some of the exhaust was my only option. I actually think the bright, hot sun was contributing to some of the problem. I'm going to do a brisket in the next few days and I'm going to be sure and put the UDS in the shade. I think the shorter stack will help also, guess we'll see. I appreciate the help and your comments on my smoker. :-D
 
Wanted to share these. I got two used drums that had sunflower seed oil in em. Had em sand blasted inside and out, then powder coated. I figure it's worth $100 each to keep my lungs clean and save almost 10 hours of burning, grinding and painting. Used the hardware from my current rusted spray painted ones. I use a method where both racks have 6 in carriage bolts (like tables) the bottom rack supports the top rack. This way the racks don't get hung up and I can swap racks mid cook with ease. This is why the bolts on the sides are so low. Also the thermometers are just for looks. I am always using electronic devices. These will stay in the team trailer when not in use. They are as shiny as a new Weber Kettle. My teammate has the same two but powder coated red. We cook on 4 one for each meat. Thanks for viewing! Mike.


Yesterday am after an overnight seasoning.


Wanted to share these. I got two used drums that had sunflower seed oil in em. Had em sand blasted inside and out, then powder coated. I figure it's worth $100 each to keep my lungs clean and save almost 10 hours of burning, grinding and painting. Used the hardware from my current rusted spray painted ones. I use a method where both racks have 6 in carriage bolts (like tables) the bottom rack supports the top rack. This way the racks don't get hung up and I can swap racks mid cook with ease. This is why the bolts on the sides are so low. Also the thermometers are just for looks. I am always using electronic devices. These will stay in the team trailer when not in use. They are as shiny as a new Weber Kettle. My teammate has the same two but powder coated red. We cook on 4 one for each meat. Thanks for viewing! Mike.

Very nice. Way too clean. Would be great to see a pic of your rack setup that you describe.
 
Thanks, Colonol00. I figured it out, beating the very edge of the lids flat against the patio and then doing my best to round it out against the top of the drum. The old lid was a bit out of round which made it a PITA. Overall, it rests pretty close to the edge. I'll need to do a little spot priming up top before I paint that drum black.

In a few weeks I'll double back on the lids and repaint them. Should I just sand down the edges and then hit it with some black high temp paint? It hurt to beat up a brand new lid like I did, but for $45 on clearance it was purposely bought for this project.
 
Make sure to post some pics as well!

finally mine is "sort" of done i'm still missing the thermometer, couple of handles and the plugs and nipples (this solution didn't work well for me) so i'm, for now, working with the magnets.
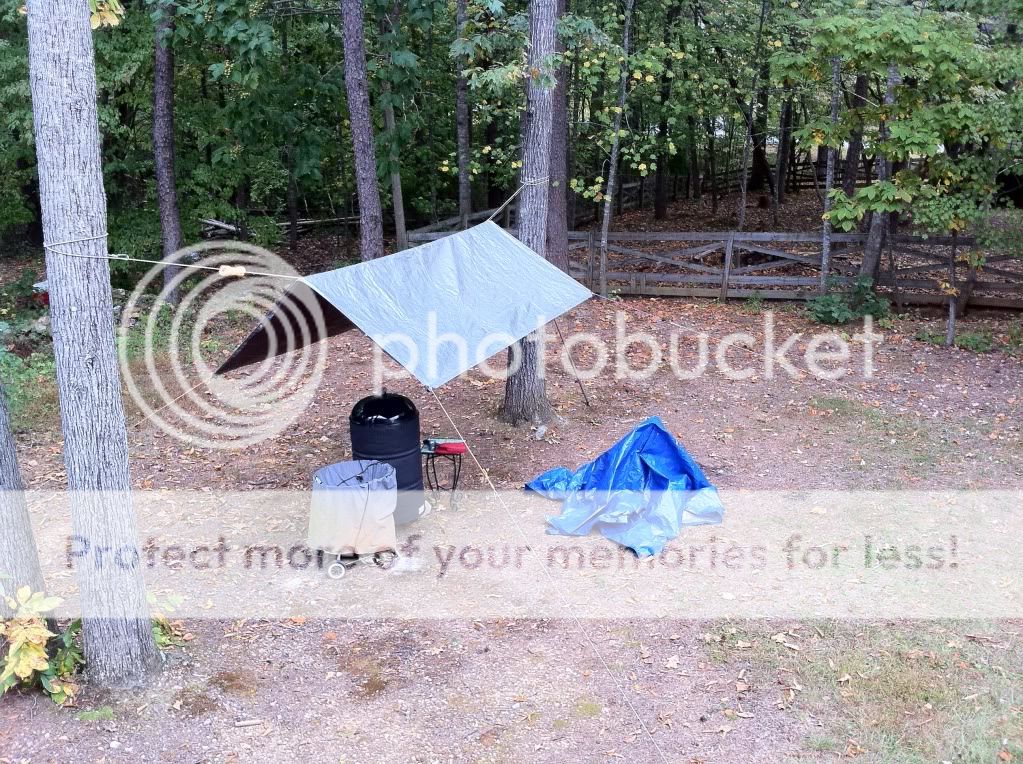
I tell you guys, i see some beautiful work being done over here, mine is a humble "ugly" smoker - here some pictures...
Well - i don't know how to insert them from flickr :redface:, but you can see them here: http://www.flickr.com/photos/54510022@N04/5045683229/

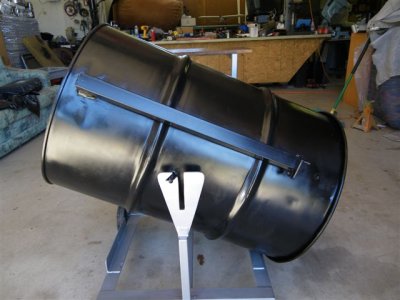
I used a brand new unlined drum, so no burn was necessary - as you can see the interior was nice and clean

There is a picture with all the hardware i used and some of the tools as well.

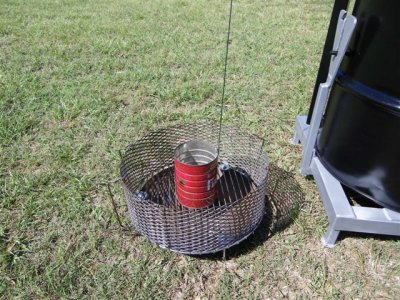
I think the hardest thing was the basket, what i did to wrap the expando to the charcoal grate was use plastic zip ties, that held the sheet in place until i was able to use the screws, funny thing is i managed to make the basket only with copule of cuts, i thought i was going to have more than just that - tomorrow i will add the pizza pan for the ashes.

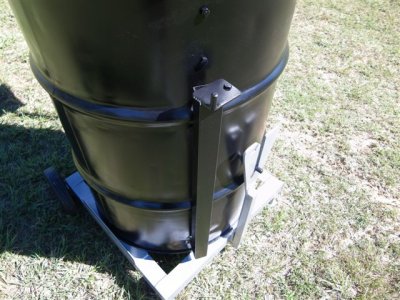
Since the paint on the drum was black, it was hard to mark it, so i used tape to mark the places. Also, i used the template some one in this forum posted some time ago, that was a real help as it gave me the correct places to make the holes.

so here is the technical information:

intake: 4-1" holes, 2' from the bottom
grill 1: 31" from the bottom (not much room here, just enough for hamburger patties, small pieces for chicken, hotdogs, etc) - i'm hopping to find a weber grill pronto
grill 2: 25" from the bottom
exhaust: 8-1/4 holes
charcoal basket: I used 2 12"x24" expando sheets wrapped around a 13" basket and for feet 3-3.5" bolt with fender washers

I think that does it - as you can see my build was pretty blah no belts and whistles - hopefuly this helps anyone trying to build this thing, if "I" could do it, anyone can, trust me! :-D

BTW i already seasoned it- although i did it without the thermometer seemed to have worked pretty good. Tomorrow i will try it with the thermo and see the real temps

What other options to use for the intakes? - i already have the ball valve, but no way to attach it as the nipples were too big (1" black tell nipple close) - can some one please tell me the exact nipple i need to buy? - right now i have 4-1" holes in my drum so please any advice base it on that.


Thanks in advance.

Thanks for yoour guidance to you all.
 
Back
Top