jmellor
is one Smokin' Farker
Well, sort of finished....all I need to do is fire her up this weekend....and maybe add a thermometer, and maybe tinker with the grates, and...
Anyway, completed the paint job a week ago and finally had a chance to assemble tonight. I figured I would summarize this in case it helps some folks in the future in addition to the other great posts out there. Or someone can help me correct any great flaws while I still can.
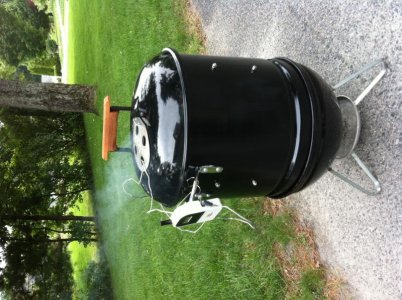
I used the standard Tamale Walmart pot ($20 at Walmart b/c the top was lightly dented), Smokey Joe Silver ($14 CL), stainless steel hardware ($5), two extra Weber grates ($16), High Temp Paint & Primer (~$12), 9" Clay Pot Base ($3) and some scrap pieces I have laying around. So roughly around $70.
I read most of the posts in the forums here and TVWB. My Tamale pot required some adjustment as it was just slightly warped. Setting the grates in it for a few days helped a lot. The top fits well now.
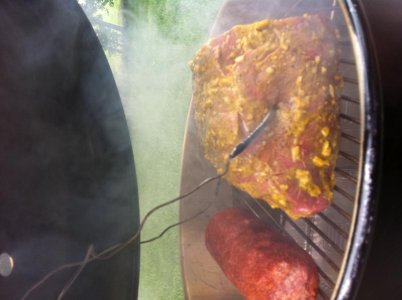
I cut the bottom out with Tin/Aviation Snips using the charcoal grate as a guide. It was very easy as others have stated. Deciding where to drill the holes for the bolts to hold the grill grates was probably the hardest part for me. I went a little low and its a bit tight. I would do them above the handle bolts on the inside of the pot next time. But I have enough room for a rib rack on the top level and about 3.5"-4" clearance for the second rack. About an 1" clearance for the diffuser/heat sink plate. The rack with the tin foil wrapped plate on it sits on the steamer holder. I used the 9" plate vs the 12". Will see how this works...
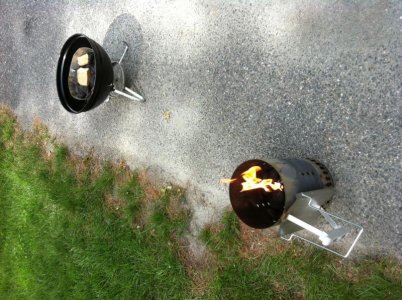
I made a charcoal basket by bolting together two pieces of metal I fashioned from an old set of charcoal holders from my weber kettle. I made an ash vent cover out of some extra expanded metal and snipping a circle from the left over bottom of the pot after I cut it out. I have no idea if this will work as intended. Just tinkering at that point... Hopefully it still allows enough air flow and keep the ash out.
I painted with Rustoleum High Temp Primer and Ace Gloss High Temp Grill Paint. The paint says it needs to be heated to cure so I need to fire it up this weekend. I am not always the most patient person so I ended up with some drips on on the pot and some gaps from my tape around the handles. But the goal isn't to keep this sparkling clean I keep telling myself
I put all the screws in place tonight and put it all together. I didn't have super short screws so I adapted with what I had.
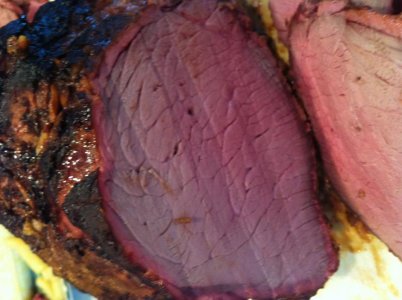
It all assembled pretty well. I had a lot of fun with the project. My sons helped out which was great. And it was a lot less daunting than a UDS (for me at least) ...Now I just need to wait until the weekend to see if she works! It should...right?.....
Here are the Pics....
Anyway, completed the paint job a week ago and finally had a chance to assemble tonight. I figured I would summarize this in case it helps some folks in the future in addition to the other great posts out there. Or someone can help me correct any great flaws while I still can.
I used the standard Tamale Walmart pot ($20 at Walmart b/c the top was lightly dented), Smokey Joe Silver ($14 CL), stainless steel hardware ($5), two extra Weber grates ($16), High Temp Paint & Primer (~$12), 9" Clay Pot Base ($3) and some scrap pieces I have laying around. So roughly around $70.
I read most of the posts in the forums here and TVWB. My Tamale pot required some adjustment as it was just slightly warped. Setting the grates in it for a few days helped a lot. The top fits well now.
I cut the bottom out with Tin/Aviation Snips using the charcoal grate as a guide. It was very easy as others have stated. Deciding where to drill the holes for the bolts to hold the grill grates was probably the hardest part for me. I went a little low and its a bit tight. I would do them above the handle bolts on the inside of the pot next time. But I have enough room for a rib rack on the top level and about 3.5"-4" clearance for the second rack. About an 1" clearance for the diffuser/heat sink plate. The rack with the tin foil wrapped plate on it sits on the steamer holder. I used the 9" plate vs the 12". Will see how this works...
I made a charcoal basket by bolting together two pieces of metal I fashioned from an old set of charcoal holders from my weber kettle. I made an ash vent cover out of some extra expanded metal and snipping a circle from the left over bottom of the pot after I cut it out. I have no idea if this will work as intended. Just tinkering at that point... Hopefully it still allows enough air flow and keep the ash out.
I painted with Rustoleum High Temp Primer and Ace Gloss High Temp Grill Paint. The paint says it needs to be heated to cure so I need to fire it up this weekend. I am not always the most patient person so I ended up with some drips on on the pot and some gaps from my tape around the handles. But the goal isn't to keep this sparkling clean I keep telling myself
I put all the screws in place tonight and put it all together. I didn't have super short screws so I adapted with what I had.
It all assembled pretty well. I had a lot of fun with the project. My sons helped out which was great. And it was a lot less daunting than a UDS (for me at least) ...Now I just need to wait until the weekend to see if she works! It should...right?.....
Here are the Pics....
Attachments
-
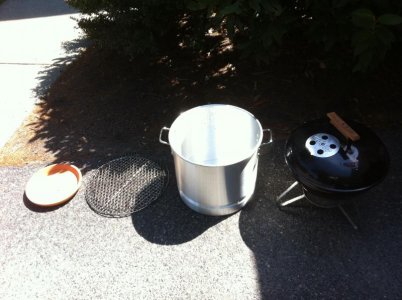 Photo Jul 31, 10 56 56 AM.jpg72.3 KB · Views: 943
 -
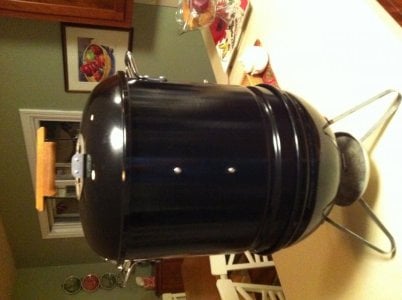 Photo Aug 08, 11 06 23 PM.jpg50.6 KB · Views: 934
 -
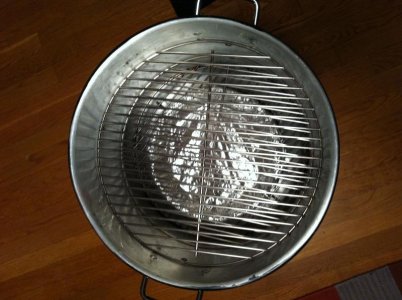 Photo Aug 08, 11 07 03 PM.jpg73.7 KB · Views: 929
 -
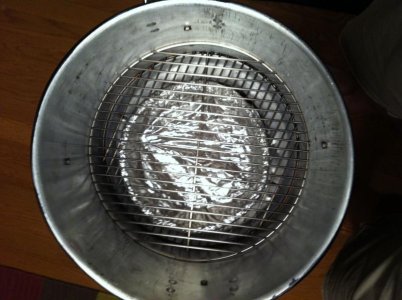 Photo Aug 08, 11 10 27 PM.jpg68.2 KB · Views: 932
 -
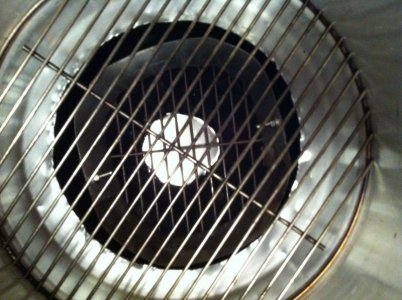 Photo Aug 08, 11 09 57 PM.jpg77.3 KB · Views: 930
 -
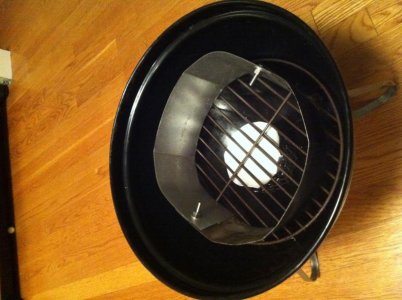 Photo Aug 08, 11 08 54 PM.jpg64.8 KB · Views: 927
 -
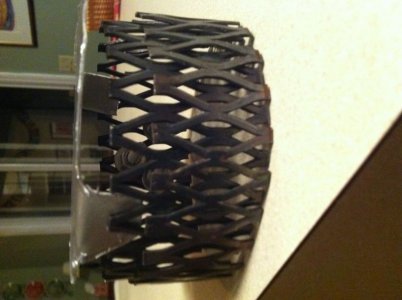 Photo Aug 08, 11 08 25 PM.jpg48.8 KB · Views: 924
 -
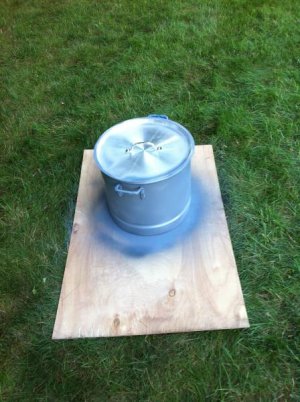 Photo Jul 31, 1 53 45 PM.jpg55.4 KB · Views: 922
 -
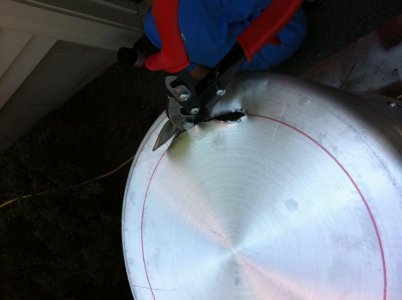 Photo Jul 31, 11 16 56 AM.jpg40.4 KB · Views: 934