ebijack
Babbling Farker
Nice !
I got my barrels the other day. I'm using 2 55 gallon barrels. I cut the lid & bottom out of one to use as the center section. The 2nd barrel, I cut on the top of each center rib to use as a base & a lid.
The 3 sections fit pretty tightly...should seal up nicely.
From left to right: Top, center, lid.

Here they are stacked.

I cut everything with a cutoff wheel on my angle-grinder. I left about 3/4" lip on the inside top & bottom, so that the center section will keep some structure. I may have to grind away some once I get the grills.

Note: They were both a seafoam green color w/ a bit of rust until I burned them out.
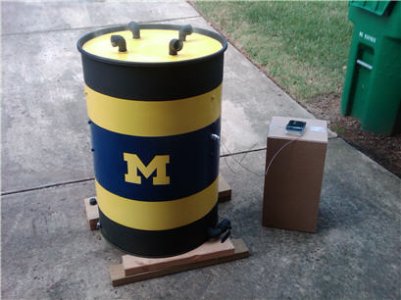
Well, other than paint & some sort of damper on the intake & chimney, it's done.
I picked up 2 replacement Weber grates & a Weber bottom grate at Lowes, along with several nuts & bolts. I then stopped at a metal supply place & bought a 12 3/4" x 50" piece of heavy guage expanded metal. Then I finally stopped by Walmart & got 2 thermometers for the smoker, and then 2 remote digital meat thermometers (all on closeout).
On the way home, I stopped at a buddy's house & picked up an old post jack (3" od) to use for intake & chimney (black iron pipe was going to cost over $25 for enough and this was free).
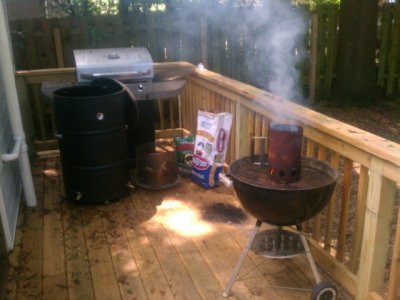
After several hours with the torches, welder, hole saws, etc., we have smoke.
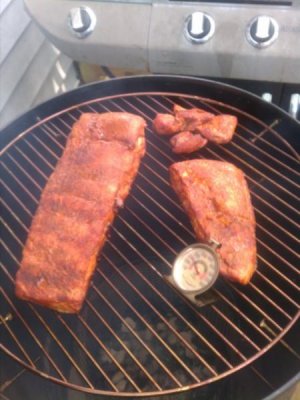
I ended up with the first grate at 24" above the bottom of the charcoal basket, and the top grate about 14" above that. The thermometers are within 1/2" of the grates.


here's some more pics from today:


I put it through it's paces again tonight. I had it up to 800* for about 15 minutes 4 times & then let it sit at 500 for another 1hr. It's been holding 250* with the coals from that for the past 2 hrs w/ using foil as a damper on the intake & exhaust.
I still want to put some handles on it, paint it, and build dampers, but it's at least ready for meat now.
Hey guys I am unable to burn out my barrel, do to where I live, so I had it sandblasted.
The attached picture is the final product after it was sandblasted it looks the same inside and out.
Do I need to do any further conditioning or is it ready to start painting? (the outside with hi temperature paint)
It seems to be down to the bare metal just looks a little rough.

Mine took about 10 minutes to get to 250. I did the same charcoal in the basket, lit a chimney about half full till white and poured on top. When I set the basket in the drum and put the lid on I leave the 3/4 valve fully open and all 3 3/4 caps off till my temp hit 225. At that point I install the 3 caps and back off on the valve to halfway and then go from there. I had to play with it a couple of times then it was set.I light my UDS today for the first time.
I loaded up the charcoal basket with Kingsford charcoal and added 15 light briquettes to the top on the basket.
It is defiantly smoking but is taking a while to reach the 220-250 range.
Any tips on lighting a UDS?
How does everyone else light theirs and what is the estimated time to get into the smoking range?
Mine took about 10 minutes to get to 250. I did the same charcoal in the basket, lit a chimney about half full till white and poured on top. When I set the basket in the drum and put the lid on I leave the 3/4 valve fully open and all 3 3/4 caps off till my temp hit 225. At that point I install the 3 caps and back off on the valve to halfway and then go from there. I had to play with it a couple of times then it was set.
I post this question in earnest, in the hopes of beginning a civil discussion
on the subject of Barrel Burning.....This is something I have pondered on a while..
Riddle me this, if a food grade barrel that has the methyl-ethyl-poly-bad-stuff liner, or not, in it, gets burned out completely to bare nekkid metal and is thought to be safe to BBQ with, why then is the run of the mill barrel, that contained stuffs without a liner be considered an unwise choice if it also is burned out in the same fashion???....
And I'm talking the reddish-white, glowing metal kinda burn........
Thoughts???
Hello All.
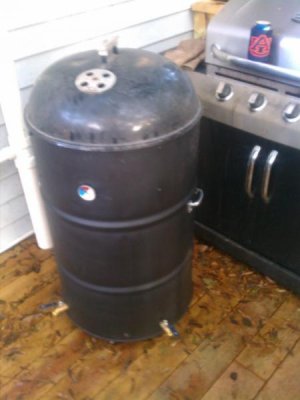
Well, I have completed the outward appearance of my UDS. I still have some stenciling to do on the lid, and I have to fabricate the basket.
Other than that, the drum is functional.
Since the yellow and blue "engine paint" cans said to cure the paint at 200 deg for 1 hour, I did that for my first "burn".
I used my charcoal starter chimney since I have not yet made a basket.
I filled the starter 1/2 with Kinsgsford blue, and dropped a lit starter cube on top of them. When I was sure that the coals were beginning to catch, I put on the lid.
I have 2 3/4" inlet pipes, and 1 1" ball valve inlet. I have 4 1" exhaust ports.
Initially I had all of the inlets open 100%.
I monitored the temps with my iGrill - probes on a cooking grate.
When the temp started climbing fast, and reached 110 deg, I capped one of the 3/4" inlets.
When the temp reached 160 deg, I capped the other 3/4" inlet.
When the temp reached 180, I turned the valve to about 50%. I did not want to over shoot and risk overheating the paint.
I was real happy with how I was able to control the temp rise.
The temp peaked at 192, and then started dropping.
I began to tweak the valve in an effort to stabilize it around 200 degF.
This is when the head-scratching began.
When I opened the valve just a little further, the temp would rise past 200 to 210 or 215.
When I adusted the valve back a little (very little, it seemed), the temp would drop back and keep going past 200 - down into the 180s.
I monitored and tweaked for about 2 or 3 hours - chasing the temp up and down. My top priority was to keep the temp around 200 for about 2 hours - for the paint. After that, I tried hard to get it to flatten out and stabilize. I never did accomplish that. My small amount of charcoal ran out after about 4 hours.
Any thoughts?
I really took my time building this UDS. I don't think there are any air leaks - that I know of.
Is the amount of charcoal and what I put it in (chimney) significant?
I know that it is not good to restrict the exhaust - better to control temps with the inlets. The area of 4 1" holes is equal to 1 2" hole - which is what many have used. Does the size of the exhaust significantly affect the temperature stability?