GrillinFool
Full Fledged Farker
A crostini is simply toasted bread, but when that bread is grilled to toast it, the crostini becomes almost magical. I have posted how to do crostinis on the site before but the pictures were so bad that I thought I should revisit the crostini. Here is the original post. Turns out this photography stuff is hard.
Back to crostinis. They’re simple to do and can be done any number of ways. This is an overview of how to make them. Feel free to try your own combos.
Ingredients:
1 baguette of soft sided bread (crusty bread will be get very hard, so make sure to go with soft sided bread).
minced garlic
fresh cracked black pepper
dried basil
havarti cheese
olive oil
No amounts here on the ingredients as each ingredient needs to be enough to cover the bread. You’ll understand in a few moments.
Slice baguette into 1″-1.5″ slices:

You can use any soft sided bread. French, Italian or my favorite, sour dough. If it is a crusty bread it will be like a hockey puck when it’s done.
Pour olive oil into a small dish or bowl to dip the bread in:

Dunk both sides of the bread in the oil:

I had to refill the plate multiple times before I got all of the bread coated on each side:

Now put some fresh cracked black pepper over one side of the slices of bread:

Here’s a close up of about how much pepper:

Now sprinkle some basil over each slice of bread:

And then put about a half teaspoon of minced garlic on each slice of bread. I know it sounds (and looks) like a ton, but it isn’t once you see the method:

Now take the back of the spoon and grind the garlic into the bread to help it stick because later on we are going to lose a bunch of it:

Here are all the slices with the pepper, basil and garlic:

Slice the havarti and estimate two slices per slice of bread:


Hold the cheese till the end.
You can use many different types of cheeses. Asiago, parm, romano, work really great as well. Romano is my favorite for crostinis. Substituting dill for the basil and dill havarti is my wife’s favorite crostini.
Now out to the grill. Doing two zone grilling. Coals on one side and none on the other:

The desired temp is over 400 degrees over the coals so we’re going high heat here.
Now put only a few on at one time as these require constant maintenance in that you can’t walk away for more than about 30 seconds before they burn and you need to constantly check the bottom and rotate them as they toast:
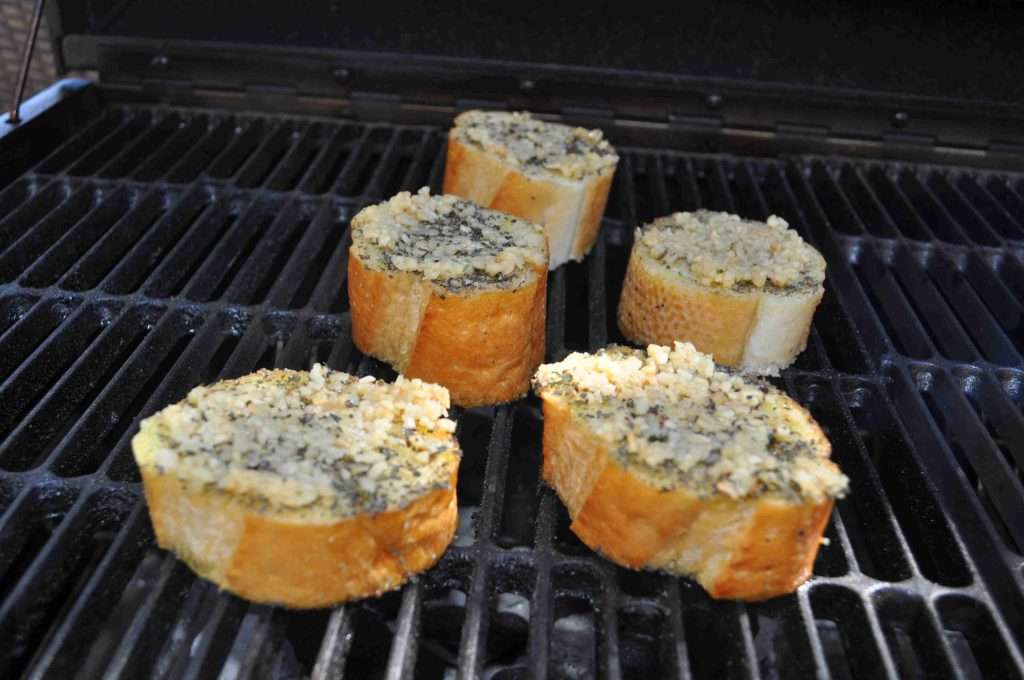
It takes only about 60 seconds per side to toast them. Flip the toasted ones once they are toasted:

Once the crostinis toast on the bottom, flip them over for another 60 seconds to toast the outer edge of the bread (the center will be insulated by the garlic and basil and not toast before the outside is burnt).
Here is where you will lose a great deal of the toppings which is why we added so much extra. Here’s some of the garlic stuck to the grill grate with more that fell through:

Once the bread toasts around the outer edges on the top, flip it back over and put on the side with no heat:

Now add two slices of cheese per crostini:

Here you can see all five slices covered with cheese on the side with no coals:

Close the lid on the Char-Broil 940 to melt the cheese:

Once the cheese melts, pull from the grill:

Give them a couple minutes before you serve them. Not to let the juices rest, because they will be about the temperature of molten lava when they first come off the grill. Once you serve these bad boys your guests are going to be blown away. This is a true home run.
Also, be sure to follow the order I put forth here on the ingredients or you will lose a lot more when you flip them. If you put the garlic on first, you will lose a ton of toppings when you flip. Also, don’t be tempted to put some crostinis over the coals while the cheese is melting on the others on the side with no heat. I made that mistake once. I turned the bread of the second batch into charcoal well before the cheese melted on the first. If serving a crowd, slice them in half so more people can sample per batch.

