Anyone talking about using aluminum fo a smoker build. I have a 5' X16' of 1/4 diamond plate and several more 4'X5. And am thinking about making a rotisery smoker. I have 316 SS for the fire box. But was wandering if any one had any insight or tried it befor.
 
Anyone talking about using aluminum fo a smoker build. I have a 5' X16' of 1/4 diamond plate and several more 4'X5. And am thinking about making a rotisery smoker. I have 316 SS for the fire box. But was wandering if any one had any insight or tried it befor.

Search the forum for aluminum smoker and you should get some threads. I know there was at least one with some good discussion in the last few months. I think the biggest concern is the fact that the aluminum will not hold heat like steel does. So, you will be burning through a ton of fuel.
 
Howdy. I am new to this, but here is my take on the drum smoker. I used scrap square tubing, welded to the drum. And I chose to put the air intake opening underneath. It seemed like this might allow the coals to burn more evenly.

And on the first go-round it worked great. Temperature control was a bit difficult, but I suspect I will get better...


IMG_1207.jpg
IMG_1206.jpg
IMG_1225.jpg
IMG_1202.jpg
IMG_1201.jpg
IMG_1200.jpg
IMG_1199.jpg
 
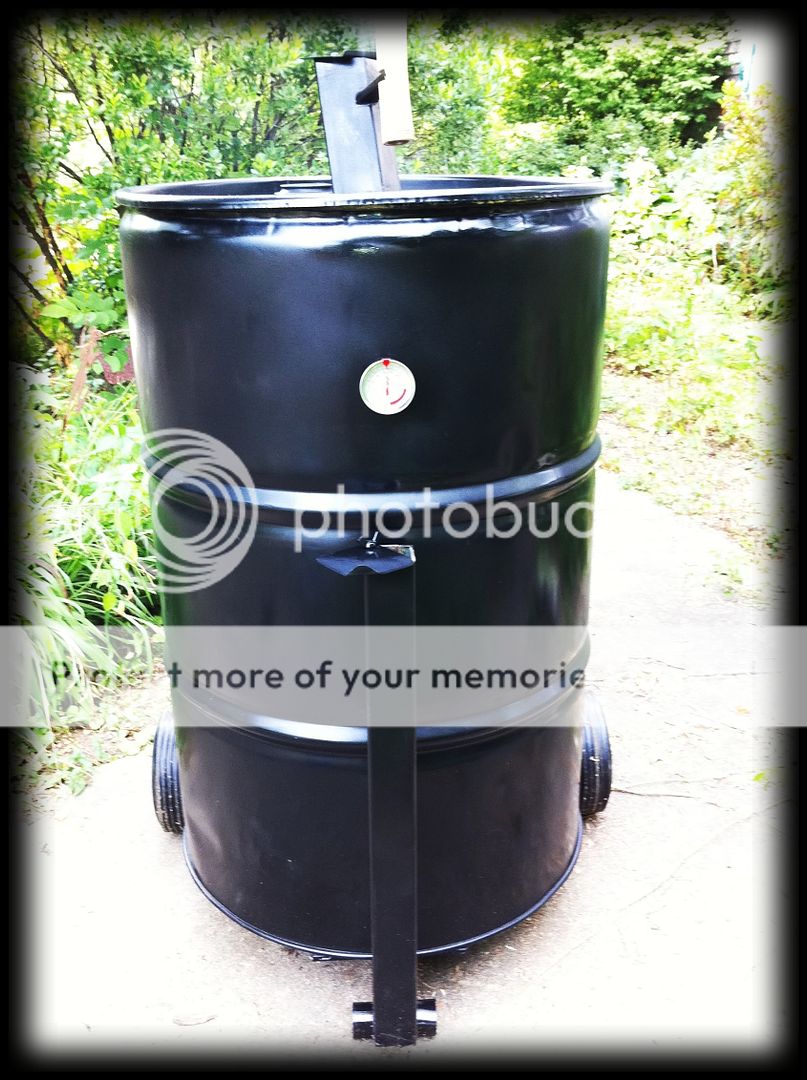
Wow man. Those pictures are huge. And that is some good looking welding.

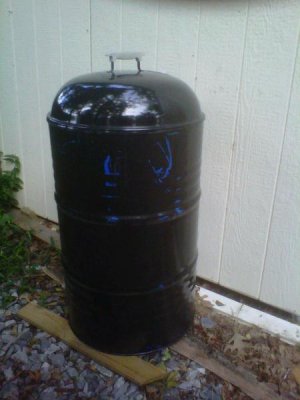
Anyway, first thing is that you should start with plain charcoal briquettes instead of the lump charcoal to help with the temp control. Once you get the hang of it, you can start mixing in some lump more and more until you're happy with it.

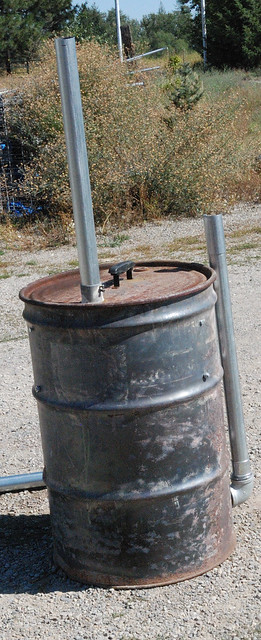
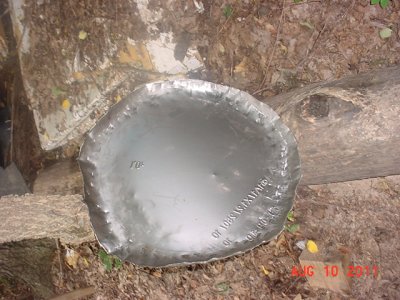
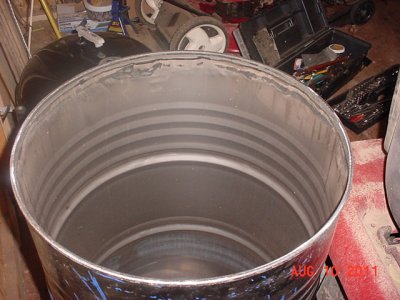
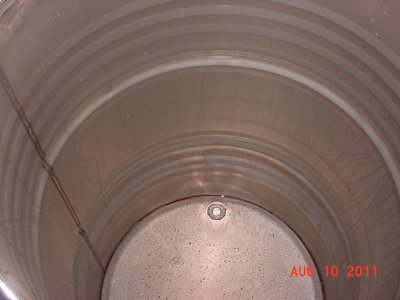
Second thing, in your fire basket with ash pan, does it have any hole in the bottom? It shouldn't because if you did, the coals in the middle (as your picture of your fire basket shows) will burn up quicker, leaving the other coals hanging around. But if the ash pan is sold, it will distribute that incoming air to indeed let your coals burn all around.
But what I can't tell in the picture, is if the fire basket has legs to stand in the ash pan. It should not be just resting on it without legs because then the air will not circulate properly into the coals.

Finally, you don't need a damper on the exhaust except to close it up when you're done. during cooking always leave the exhaust fully opened and control temp only by the intake.
 
Briquettes may give you more consistent temps, but they leave a huge amount of ash behind. Once you get the temp dialed in, lump is no harder to control than briquettes, plus you have no nasty fillers flavoring your food, less ash, and better aroma/flavor.

I know we all use legs on the bottom of our baskets, but air flow is only involved in that the space allows the ashes to fall down out of the charcoal. Once the air is in the drum, the fire will use it, regardless of where it comes from.
 
soapy, like this?
3917862653_068b7cb2fb_z.jpg

the bung is 2" pipe thread. black pipe is heavy, I used 2" electrical conduit much lighter and cheaper

yep.. thats it.. so the electical conduid.. didn't think of that.. no issues with galvonizing or anything on those?
 
For thermometer holes, I drilled out a replacement car valve stem. Fairly cheep. I have one right below my grate for pit temp, and a second a few inches above my great where I thread a digital remote for my meat temp. Both of those are digital on mine, but pretty sure a turkey thermometer would work fine for the pit temp. I have a mounted thermometer as well, which I just leave attached 24/7.

I used a nipple screwed into my bung hole for my smoke stack on my second UDS. I used a threaded conduit fitting and some metal conduit on my first.
 
First%252520pic.JPG


UDS%252520Basket.JPG


Got my UDS built!!I have a problem temperature control when I hit 200º I put both caps on and leave the ball valve 100% OPEN with the big bung hole on top OPEN..But my heat starts to drop.then I remove one of the intake caps and adjust the ball valve and the temp goes 250º+
 
Last edited:
7.JPG


Here is a picture of my thermoeter arrangement (the little chome piece is the valve stem - I now have another about 4" above it. Sorry no pic on the nipple. It was just easier and cheaper than the conduit. It weighs a little more - but it is only a 2" or 3" nipple, so does not weigh too much more.

Here is a link http://www.bbq-brethren.com/forum/showpost.php?p=1420250&postcount=6890 to the post with the rest of my pictures - including my basket assembled with hog rings, a chickens foot lift assembly, the pizza pan ash pan, the single bottom air intake, the diffuser plate to make for a very even burn, and my #12 can fan box.
 
Hi,
Been reading this thread for a few days now, got the bug to build me 1 of these.
Got my design ready, measurements, parts list etc. The only thing i can't get a decent price on is the bloody drum1 :-( does anyone know of any uk based Stockists of open top, unlined, 55 gal drums?
Much appreciated.

Regards

James
 
New from Nashville TN; UDS project started

Got my Weber grill today.....$45 for it and it had been used. The PO wouldn't negotiate more than $5....and the charcoal grill was kinda rusty and corroded, but not unusable, just not new anymore. The cooking grill was used, and it will clean up........but the all important dome lid is in excellent condition and (Drum Roll please!) It fits my barrel rim perfectly!

Now to start the construction. Before I commit to cutting out one end, I've got to see if I can plug the 2 1/2" threaded opening. Think I will use it for a clean out drain. So I need to find a suitable threaded plug if I can't find a replacement drum plug.

Here is the Barrel with the Weber dome lid sitting on it. It has already got a permanent location just off my deck at the corner of my house where my firewood rack is located. My wife wants me to cut down a runaway shrub that is ugly(??) and set it on top of the shrubs present location.......who am I to argue with my wife?
 

Attachments

  • peuf_20110805_49.jpg
    peuf_20110805_49.jpg
    30.9 KB · Views: 799
I'll try to do some detailed photo's as I go with the build.

I stopped today and bought the expanded metal for the charcoal basket. 11" x 48" for the wall of the basket, and a piece of expanded metal 13" x 17" to beef up the floor of the grill grate, which in my case is a little rusty and corroded, so I wanted it to last more than a few burns. The whole amount for the pieces of 9 gauge expanded metal was only $15.92 tax included.

So with my Drum (free), the Weber grill ($45), and the expanded metal ($15.92) that is just under $61.00.......I have a electronic sensor thermometer, and I have a manual dial probe thermometer for the interior temp monitoring. So the only expense left is the hardware for the cooking grills to hang on, and I want to buy another cooking grill at Wally's Garden Ctr ($12) plus I need to come up with an ash pan to add to the bottom of the charcoal pot. I should come in under $80 for this UDS project. I'll keep a tally as I go. I may under estimate the bolts/nuts and ball valves costs. I won't count my welding time and I may use my Vets advertising magnets for my intake openings for a while until I've got more Moolah in the wallet.
 
I got a little done today. I cut the bottom of the drum out and I found the inside is unlined. All I have to do is clean out the Windshield Washer fluid and then start drilling the intake holes.

The lid is a little tighter than I realized. I think I'll grind off the rim with a angled edge from the outside to the inside rim edge. I think that will make it just right. As it is right now, it will fit if I press it in place and then it takes a little effort to remove it. I don't want that lid to fight me when the heat is on.

Also I discovered that the bottom cutout can serve as my ash pan. I started to form some sides on it with a hammer and using a log laying by my shop, I can probably get it more or less stretched into a half way decent pan. It doesn't have to be pretty, but I want the sides closer to the 17" diameter so I don't have to fight to get it out of the drum to empty the ash and refill the charcoal.
 

Attachments

  • smoker insides 002.jpg
    smoker insides 002.jpg
    154.7 KB · Views: 804
  • smoker insides 003.jpg
    smoker insides 003.jpg
    150.8 KB · Views: 803
  • smoker insides 005.jpg
    smoker insides 005.jpg
    140.6 KB · Views: 803
Last edited by a moderator:
mike5150, I don't know what temp u r triing for. Try leaving 1 cap off and adjust with ball valve:idea:.
 
Hey, can everyone stop posting for a week or 2 so I can get through this thread!!! Only on page 121! I figure while I'm searching for my free or super cheap drum, I may as well go through the whole thing & get as much info as possible. Looking forward to building mine.
 
couple of questions?

1. What's the purpose of using the ball valve's and piping on the outside.
2. Some have vent holes, some just have piping.

I've read until I wanted to scoop out my eyes. There's just too many pages to go thru.
 
Only on post 5355 and this is my 1st post after the cattle call. Got my drum started so I figured I'd chime in. Google was nice enough to show all the other brothers that have used easy off to get the red lining out - thanks google.

First I sprayed a test spot and not much really happened. So I sprayed what was left (about 3/4) in the can put the lid on and let it sit 24 hours. The lid still had the rubber gasket and I put the lockring on for good measure.That bitch was sealed. About 80% came out with just the hose didn't even touch it. The 20% was a big patch toward the bottom that I must not covered too well. Sprayed 2nd can and sealed for 24 hours. Hosed it out again and it was at least 95% bare metal.

The local FD said no burning this time of year. I was on my cell so I'm going with he broke up when he said no. Figured if I could get the lining out and used some hardwood fireplace logs there would be minimal black plums of burning lining and cheap pine. Burned the thing for like 6 hours and no visitors! Rock on. Not looking forward the wire wheel part but I'm pushing past that cause I want some Q! Thanks everybody who has contributed to this thread.
 
couple of questions?
1. What's the purpose of using the ball valve's and piping on the outside.
2. Some have vent holes, some just have piping.

The ball valve gives you an easy way to fine tune the amount of draft - and due to the nature of the handle - it is fairly easy to reproduce. You only need one valve (and two caps) to create any fraction of flow between 0-3 open holes.

That said, magnets work the same as caps, plus you can crack open a hole with one (fully adjustable). It is just not quite as easy to adjust and reproduce as the valve.

Exposed piping is to get the valve higher so you don't have to bend over.

I use my foot instead of bending over :becky:
 
Back
Top