Ok first off......I know....I know....I know....I know....I'm sorry for not posting in over a month and yes we are still alive
")
Summer is here life has been crazy busy and we've been working on this thing off and on between me working OT at work and all. I would say we are about 75-80% completed at this time. There are tons of pictures below covering the last few weeks of work that we've done.
BIG SHOUT OUT TO: Landarc, razrbakcrzy & Will work for BBQ and everyone on here who has given us such wonderful ideas that hopefully helps prevent issues after the build.
Also I purchased a Rotisserie Spit set that has a 45" spit rod and 50 lb. motor. Here is the link:
http://www.onegrill.com/Spit_set_w_brackets_and_Motor_p/4ps95.htm
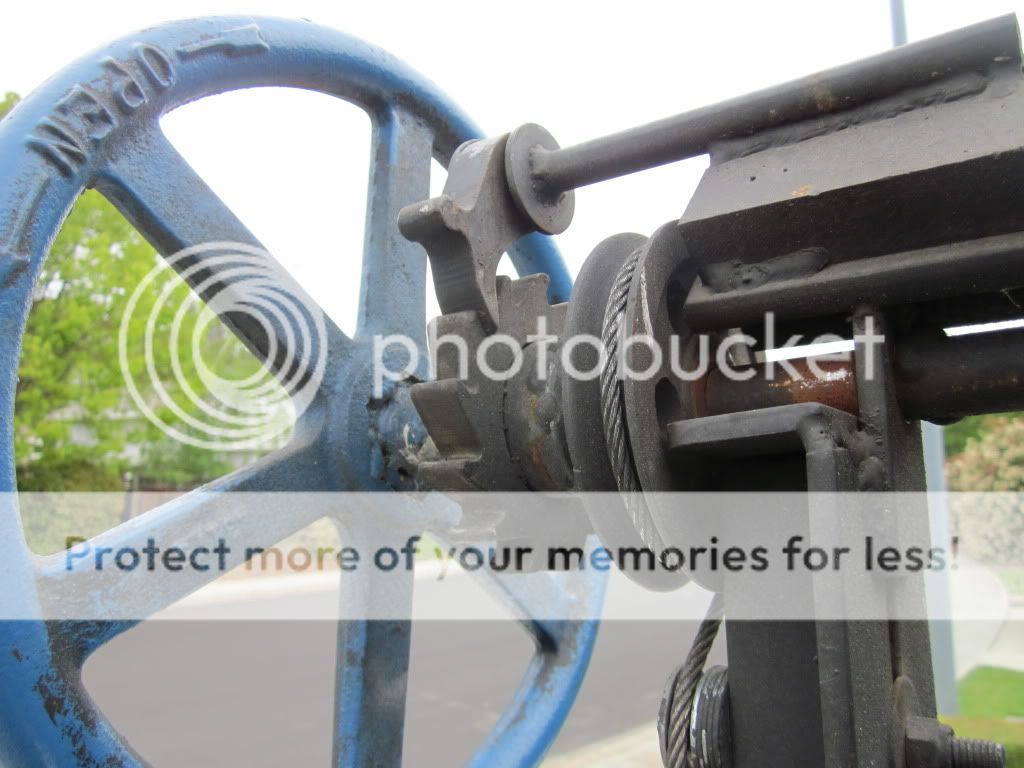
Chad and I have been looking at different way to mount this so it's as center as possible. The Rotisserie is made to go over the large grate only and obviously we have to keep motor away from heat. We've thought of drilling a hole in the center of the railings, but that didn't end up for a reason I don't remember now. So we are looking for some ideas to get the wheels turning on how this will mount. It comes with a standard motor mount that you can see towards the bottom right hand side of the picture. Please give us some ideas : )
So without further delay.....the pics :
Welded corners of grates and grinded down
Chad measuring what will become the first Gussett
First gussett being held in place ready for tac weld to hold it in place
Chad welding the first Gussett
Back side of welded gussett
Front side of Gussett attached to grates
Large grate with gussetts added
Large grate weighing in at 68.6 lbs.!!! Small grate came in just under 40 lbs.
We also added gussetts on the underside of the grates as per your great ideas
Close-up of gussett welded to bottom of grate...***MIKES FIRST WELD!!!***Ya I know pretty ugly ehhh lol
The Beginning of the rails that the grates will slide up and down on
Continuation of building rails/frame work
Square steel added between the railings. It joins the small and large grate frames and gives us a gap so that there is room for the rod that will hold the cables and wheels on each side since each grate will be independent of the other
Another piece of square pipe this time towards the top of the frame. You can see the cross bar tac welded on top
The Square pipe spacer has been welded and grinded down to a smooth finish
Completed frame....bar at the bottom is to hold it together for transporting etc...We drilled holes at the bottom and it's held in by bolts.
Completed frame with grates on it. Some minor tweaking to do but other than tha great
Many more pictures to come. We have the 4" angle iron to still add to around the frame that will allow it to sit in the masonry box we are building.
Thank you again to ALL of you that have given us so many ideas to run with and please feel free to comment if you see something that can be done better or different. You won't hurt our feelings we're always looking to improve.
-Mike