• working on DNS.. links may break temporarily.
Working on building my first UDS right now. The drums I've got have removable locking lids, and the lids themselves have a ~2" bung and 1/2" air vent both with screw-in caps. In y'alls vast experience do you think just removing these caps during the cook would be enough ventilation for the smoke or should I drill some more holes? Right now I'm thinking that the bung alone would provide about as much flow as the vent on a Weber lid so no additional modifications would be necessary, but would appreciate insight from you guys.

Thanks.

What I've done and like is using a black metal threaded pipe with an elbow attached so if it rains, it doesn't fall into the drum.
 
I use a 50/50 mix of Royal Oak lump and Kingsford blue.
UDS1003.jpg

my OCD tells me you have not meticulously arranged your fuel :becky:
 
What I've done and like is using a black metal threaded pipe with an elbow attached so if it rains, it doesn't fall into the drum.
+1 used a steel nipple. Lid collects water during a rain. You can always put a can over the nipple to keep the water from raining into the hole
 
what are you guys using to cut the hole in the top? My step bit only goes to 1 3/8"
 
Here we go

My son called me up and said he had a FREE :becky::becky::becky: drum for me. All I had to do was go get it. I have read 90 percent of this thread and feel confident that I will have a new addition in a week or two. I have already got the 3/4 nipples, one 3/4 elbow, two pipe caps, and now I have the main part. I will probably go buy a cheap kettle so I can get a lid and grate.
CIMG0447.jpg

Since it had Hydraulic fluid in it I don't have to worry about a liner, just need to clean it and give it a good burn:-D

CIMG0448.jpg


This is the lid to my Weber, I do not want to have adjust it to fit the drum so I will find a new cheap kettle or a used Weber at the right price
CIMG0449.jpg
 
I live in the KC area, where are you finding drums under $30? Found several places selling junk for about $25
 
one set aspen/mahagony removable side shelves awaiting linseed oil - why not add some accelerant?

184772_1851808340545_1400856699_32058818_2975878_n.jpg


close up. the shelves slide into the handle in case i don't want to use them or future mods/accessories.

183296_1851808940560_1400856699_32058820_1760216_n.jpg


the twins. i should be finishing the other set of shelves instead of posting :becky:

180827_1851808700554_1400856699_32058819_1371830_n.jpg


this one has to do with losing stuff

182636_1851836661253_1400856699_32058842_2253176_n.jpg
 
"Quote This is the lid to my Weber, I do not want to have adjust it to fit the drum so I will find a new cheap kettle or a used Weber at the right price
CIMG0449.jpg
[/QUOTE]

I took a grinder to the top rim and took enough off all the way around until my lid fit. You might even try the lid on the bottom if you didn't cut it open yet, it might fit better.
 
I never thought about trying the bottom, thanks for the idea Blackdog:thumb:. I still want another Weber lid just to keep things simple and I just ordered a Smokenator for my Weber.
 
nice looking rigs righteous dog.

after my 6th cook now, i figured the spike wasnt really a spike. my smoking wood was smoking rather heavily initially causing the temps to be lower (albeit 220-230). once the smoke settled down it wasnt choking the fire out hence the increase in temp. i need to just wait a bit longer for it to dial in before leaving it alone. my buddy is bringing me 30ish lbs of boar he shot down in FL tomorrow. wish me luck, its my first boar cook.
 
So I finally finished up my UDS build this weekend and broke it in with a 3 hour empty burn with the intakes wide open, then cranked it down to 225* and seasoned it with a few fatties, then cranked it open again and let it run the rest of the day. I have to say that if there any non-believers reading this thread, if you follow the general guidelines set forth by the brethren they will definitely deliver as promised. When all was said and done, I ended up running around 350* for 9 hours total and 225* for 3 hours total and only used about 8 lbs. of charcoal. Un-farking-believable. Now on to the pr0n:

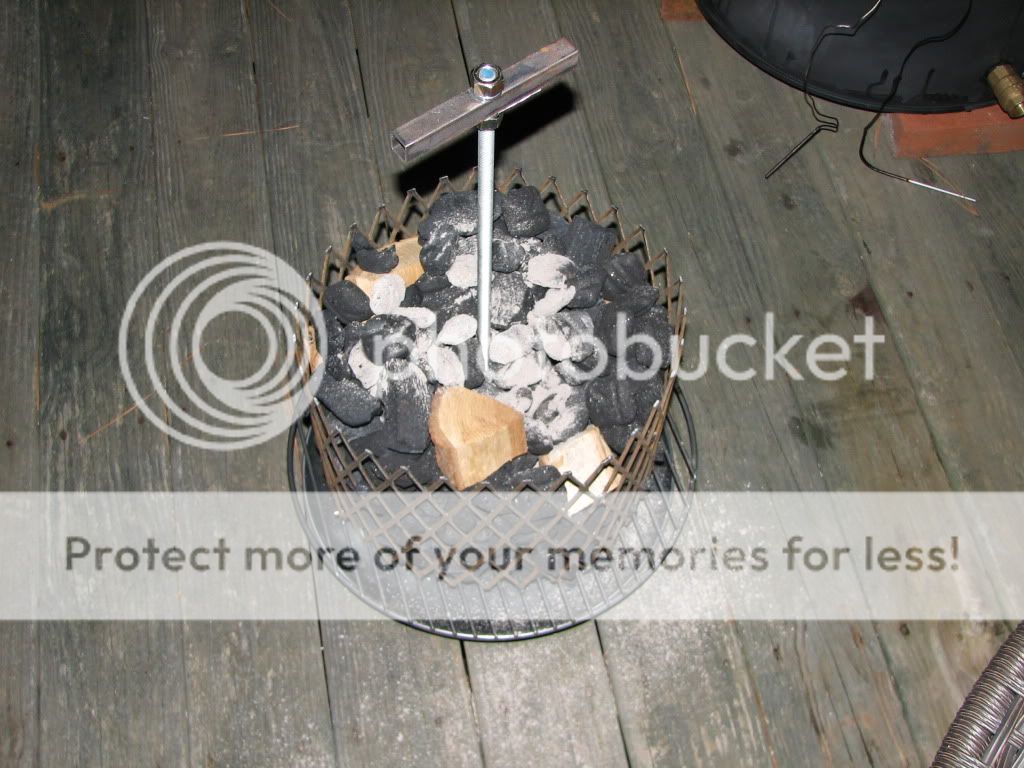
For this first build, I went with the no-frills-no-skills approach. No welding, no step-bits for the big intake pipe hole, no grinding or cutting. The basket is made up of the charcoal grate from a Weber kettle, 2 12x24" sheets of 18 ga expanded steel, and then some bolts, nuts and bailing wire where necessary:
img2830x.jpg


And here's the UDS itself. For the intakes at the bottom, I drilled 3 3/8" holes around the bottom and covered them up with 1" diameter magnets. Bottom rack is 22" above the base of the charcoal basket and the top rack is 6" above that. Thermometer is the basic 100/475 from BBQ Bonanza.
img2831e.jpg


Minion method setup. Coals lit with weed burner
img2837ob.jpg


First batch of "seasoning" fatties
img2844j.jpg


With two intakes blocked and the third at 3/4 open, it settled in to 225* exactly shortly after this and held steady with no tending. I'm blown away by the efficiency of the rig!
img2847o.jpg


And here's a shot of the final product. The one on top was stuffed with sauteed onions and cheddar with Corky's rub. The one on the bottom was stuffed with bleu cheese and bacon with steak seasoning on the outside instead of a rub. I got busy tending to a sick kid so they overcooked a little, but still turned out great.
img2854h.jpg


Thanks to everyone who has contributed to this thread. This UDS will bring me and my family a lot of joy and full bellies for many years to come. For anyone on the fence about building their own UDS, do it! There's just something incredibly satisfying about smoking your food in something you built, which just happens to be something that most others use as a garbage can!
 
Back
Top