question about parts replacement on old Imperial Kamado

O

osx-addict

Guest
hi all. I've acquired an old imperial kamado for $10 from a neighbor. All of the upper dome and base are still in one piece.. However, the metal needs a bunch of TLC (lots of rust). The one item I'm in need of a replacement for is the draft door which is frozen open (rust). I think someone mentioned that a BGE draft door might work...are these something I can get at my local BGE dealer?

Also, what sort of paint can I use? Should I stick with high temp paints to avoid it burning off? I'll post some images later when I'm on a real computer instead of my phone...

TIA!
 
Some pictures of my project...

Here's some pics..

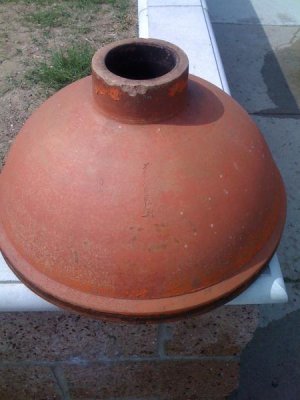
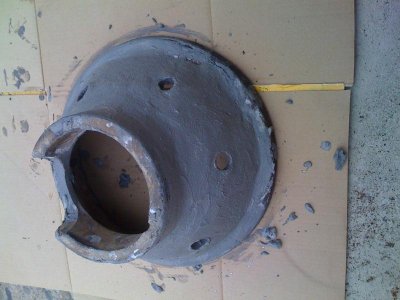
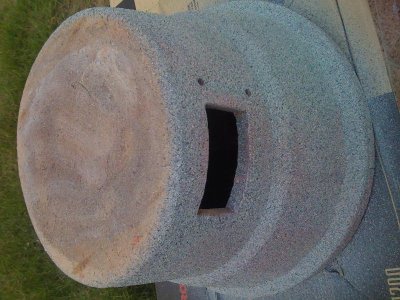
The first is the dome after being taken apart.. Notice the japanese characters on the front of the dome -- Is this a feature of the Imperial Kamado's?
IMG_0177.jpg

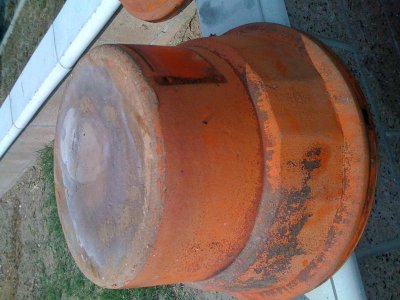
Below is the base -- the paint is flaking off like crazy.. It's a interesting orange color -- luckily w/o any visible cracks..
IMG_0176.jpg

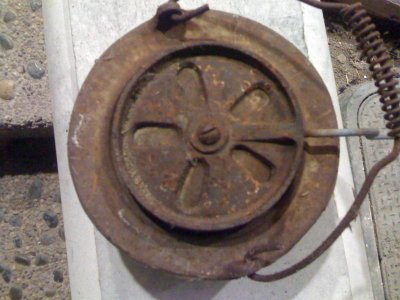
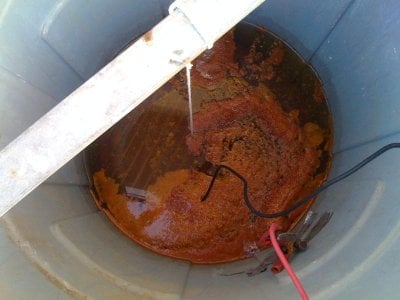
Below is the top damper (sorry for the poor photo)-- rustly like crazy but it appears to function -- nothing is locked up with rust at least.. It's currently in an electrolysis bath -- we'll see how much rust I can get off..
IMG_0174.jpg

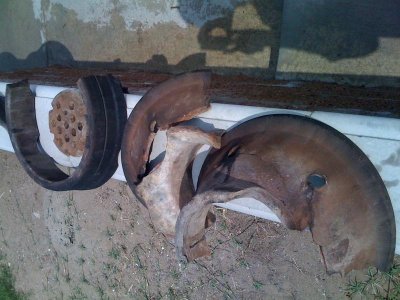
Below are the various parts of the firebox.. Luckily all pieces are accounted for..
IMG_0180.jpg

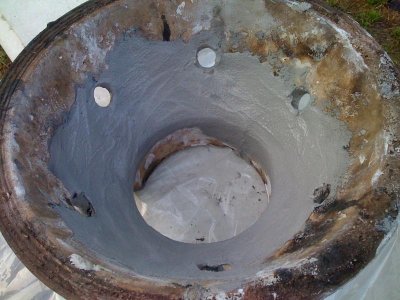
I spent some time yesterday piecing together the firebox using Rutland furnace cement (bought at my local Ace hardware store) and had to thin it out (it's pretty thick stuff) with water (per the directions) to something about at thick as cottage cheese.. Once in that consistency, the firebox went together easily (I wet all surfaces before applying RFC to ensure no water is sucked out of the RFC early).. I then slathered the stuff over most of the outside of the firebox to work as a single new surface.. I'll still need to do the inside before heating it back up.. If this doesn't work to keep the firebox together I'll probably try some M61 or M62 (from Kamado) since I've got some sitting in the freezer (bought for a recent repair of my K7 Kamado) IMG_0183.jpg
 
Nice work! What size is it?
The Modern style Imperial Kamados are my favorites because you just don't see too many of them. Its great to see someone else refurbishing one. Check out the IK site for the history then hit the Naked Whiz and download the Pre 1976 BGE/Kamado manual for firing instructions. Keep us posted on the progress!
http://imperialkamado.com/i_japaneseKamadoHibachi.htm
http://www.nakedwhiz.com/infocentral.htm

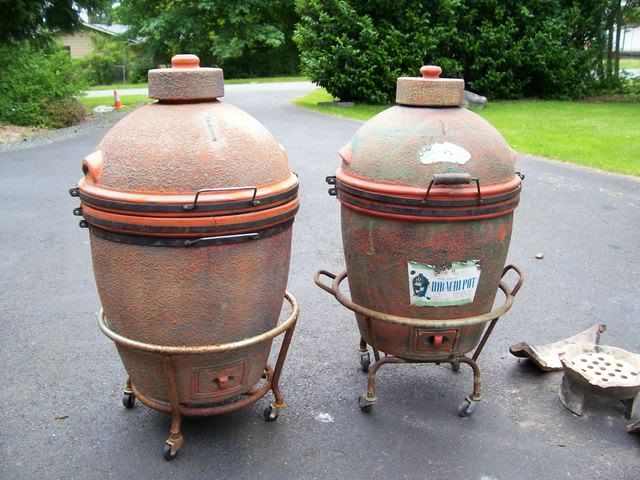
Here are my Large and Medium Moderns pimped out with BGE spring assist hinge and stainless steel slide drafts.

100_2221.jpg


100_2565.jpg


Download this from the Naked Whiz!

100_2571.jpg


Holler if you need any more info!
 
Swamprb--

I *think* its a Modern Style Large based on the grill size of 16".. I checked over at BBQ's Galore (my local BGE dealer) and they only had a 15" or 18" grill available.. I think 15" might be too small.. Unfortunately the old grill is quite rusty but I suppose it might be able to be cleaned up to a usable state..

Do you know if the Imperial Kamado's normally had japanese characters on the lid? Just curious.. I know that Richard Johnson's early Kamado's were that way but wasn't sure about the Imperial Kamado's.

Also -- I took my rusty draft door to check the size of the BGE replacements and found the door to their 2nd from the bottom size grill to be very close (the holes were a little different) and could probably be adapted by re-doing a pair of holes in the base on one side. Is that what you had to do to fit the new BGE doors?

One more thing? What kind of paint should I try using? Someone on the Kamado forum used a product called Fleck-Stone for texture (see pics in the thread below -- it looks pretty sharp to me http://www.kamado.com/discus/messages/1/41826.html

Anyway, that's about it for now.. Thanks for any info you can provide!
 
The LBGE slide draft will fit a Large and Medium Modern style no problem, bolts right on! If you have an 18" grate it is a Large and a Weber will fit it, if its smaller a smaller grate that is another story! I was able to salvage mine, but I just picked up a Hibachi Pot Kamado/Medium with the oddball sized grate.
100_2681.jpg


Take a look at the IK repair link, I followed its advice on the Large and just used a Green Enamel spray paint and I've had no problems with it. The Red Medium, I used Dupli-Color Engine Red, to match my Red Webers and it works great.
http://imperialkamado.com/i_faq.htm#Rejuvenation of Your Kamado:

Check out the restoration link I did on the Medium IK and a Large Chinese BGE/Kamado. You might recognize tomjax's repairs I included from the Kamado.com site. It should help you a bit.
http://www.bbq-brethren.com/forum/showthread.php?t=41145&highlight=Imperial+Kamado

I have two more restorations in progress besides my BGE, a Large Sakura Kamado and the Medium Hibachi Pot Kamado. Both are Japanese with the plug type draft block.

100_2684.jpg


100_2685.jpg
 
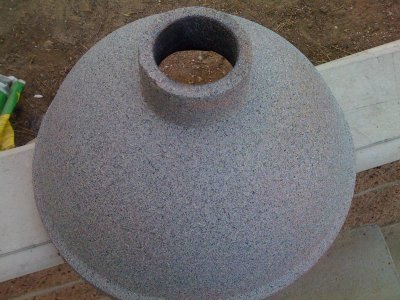
Ok.. Some more photos of the project.. I painted the dome & base with some Krylon 'looks-line-stone' textured paint.. Below is the resulting outcome.. We'll see how it holds up to the heat..
IMG_0189.jpg

Here's the base..
IMG_0187.jpg

Here's the firebox with more Rutlands on the inside -- it'll get more low temps to cure it in the kitchen oven.. No bubbles on the stuff I did last week.. So far so good.
IMG_0185.jpg

Below is the grill in the electrolysis bath..
IMG_0190.jpg
 
That stone paint looks pretty cool, and the electrolysis bath is very intriguing.
 
I ended up removing the grill from the bath yesterday and removed the remaining crud with a wire brush.. I was left with a greasy feeling grill afterwords. I ended up putting it in a trash bag this morning with about a cup of ammonia to see if it would work some more magic to reveal the grill from beneath the grime.. I'll probably still keep an eye out for a 16" replacement just in case..
 
2nd on the stone paint. It really looks good! Let us know if it holds up to the heat.

You can try this replacement grill http://php2.secure-shopping.com/hawgeyes/product.php?productid=430&cat=7&page=1 It's only 1/2" too small. I'll be ordering one for mine.

My medium Kamado has the same characters on the front. Is it sacrilegious to drill a hole in it to mount a thermometer? I'd loosen the bands and spin the top around. So I'd be drilling in the back of the dome and mounting it backwards.
 
My medium Kamado has the same characters on the front. Is it sacrilegious to drill a hole in it to mount a thermometer? I'd loosen the bands and spin the top around. So I'd be drilling in the back of the dome and mounting it backwards.[/QUOTE]

Is yours a Modern style or Traditional Imperial Kamado?

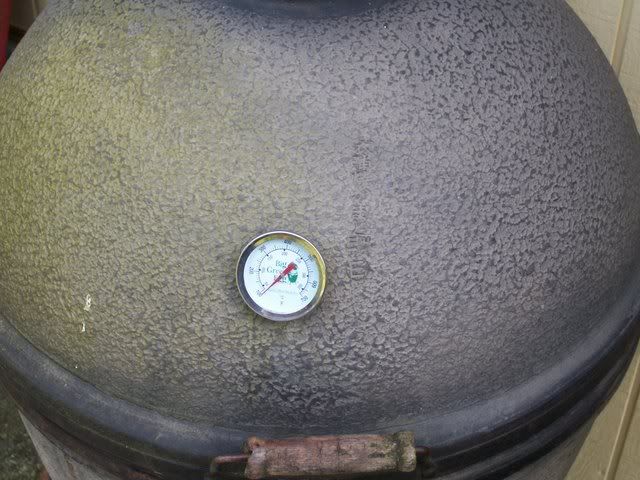
My neighbor drilled a hole in his lid just to the side of the Japanese characters and mounted a Big Green Egg thermometer. I stick either the BGE or a Weber thermometer in the Daisy wheel vent. I don't really need it though since I only grill on it.

100_2523.jpg


osx- the fleck stone finish looks nice!
 
Mine is a medium traditional kamado. Here is a photo of it:
p918684876-4.jpg


I refurbed it a bit.

I grill on it and smoke, so a thermometer will be useful.
 
Mine is a medium traditional kamado. Here is a photo of it:
p918684876-4.jpg


I refurbed it a bit.

I grill on it and smoke, so a thermometer will be useful.


That is beautiful! What paint did you use on it?
 
OSX: Good job on the restore. That stone-texture paint looks great. Is it rated for high temperatures? After painting Humpty with high-temperature copper paint, it was quite tacky during the first few firings, but less so after a few more firings. Hope the stone paint is the same way. Don't know about the "moderns," but my old claypot starts getting almost too hot to touch on the outside when the dome temperature reaches 300F or so.
_______________
MayDay
Project Humpty
 
Drilling the Dome

Is it sacrilegious to drill a hole in it to mount a thermometer? I'd loosen the bands and spin the top around. So I'd be drilling in the back of the dome and mounting it backwards.

So far for Project Humpty, I've drilled 2 holes for mounting a thermometer. Both worked out fine, but the second hole was cleaner as the underside had been reinforced with 4 layers of furnace cement.

The first hole was drilled before I did the "dollar bill test" (no $1 bills here, so used a narrow piece of paper). It ended up cockeyed at 8 o'clock (viewed from the top) as this was the position that sealed the best.

The second hole was drilled at 6 o'clcok after doing Humpty's Phase 2 repairs and repeating the dollar bill test. The thermometer now sits centered when looking straight at it from the front. You can see the first hole on the neck at 8 o'clock - it's plugged up with black Stove and Gasket Cement - it's not painted so that I can find it if I need to use it again.
iE7C335C3-5A7D-4D17-999D-E412E37B3754.jpg


The 2" gauge thermometer on Humpty is a cheap 12" deep fry probe that goes up to 550F only. It's 12" because I couldn't find a shorter probe and I wasn't willing to shell out $35 for a Primo or Weber gauge. Length is not an issue because the mounting clip at the back lets me adjust the depth as required.

I find the gauge thermometer useful. It gives me a visual indication without having to set up my digital probes. It's also the mechanical backup for my digital probes. For some reason, the gauge reads consistently lower (at all depths) than my digital dome probe, which is inserted through the smoker top. :confused:

If you decide to drill a hole for a gauge thermometer...
Make sure to do it after you've done the dollar bill test and after you've tightened the bands. Then decide where you want your gauge. Don't drill a hole by spinning the top around without checking things first. Most likely you will have alignement problems leading to sealing issues and then get hot spots that could melt your gasket.

Use a concrete drill bit just slightly larger than your probe diameter. Start the hole perpendicular to the surface. Depending on the length of your probe, you may have to angle the bit so that the probe sits properly. Don't force the drill too hard. Once the hole is drilled, just drop your gauge in.
____________
MayDay
Kamado/BGE, Cobb
Project Humpty
 
Last edited by a moderator:
That is beautiful! What paint did you use on it?

Thanks, Brian. I used the Ace Hardware brand high-temp grill spray paint. I don't know if someone switched the tops on the cans, because I used the matte black, and it gave it a slight shine. The shiny black, at least in the store dried to a chalky matte black finish. I tested several cans, and they all produced the opposite of my expected results.

Now I just need to figure out if the medium nest will fit this guy and I'm all set. I'd like it to sit higher up.

The first hole was drilled before I did the "dollar bill test" (no $1 bills here, so used a narrow piece of paper). It ended up cockeyed at 8 o'clock (viewed from the top) as this was the position that sealed the best.

The second hole was drilled at 6 o'clcok after doing Humpty's Phase 2 repairs and repeating the dollar bill test. The thermometer now sits centered when looking straight at it from the front. You can see the first hole on the neck at 8 o'clock - it's plugged up with black Stove and Gasket Cement - it's not painted so that I can find it if I need to use it again.

If you decide to drill a hole for a gauge thermometer...
Make sure to do it after you've done the dollar bill test and after you've tightened the bands. Then decide where you want your gauge. Don't drill a hole by spinning the top around without checking things first. Most likely you will have alignement problems leading to sealing issues and then get hot spots that could melt your gasket.

And thank you, MayDay. I didn't even consider that! I'll be ordering a BGE thermometer shortly.
 
Mayday --

The paint was not specifically rated for high-temps.. In fact, I saw NOTHING on the Krylon page for the product indicating that it would or would not withstand any sort of heat usage.. Only time will tell.. Like I told the ACE hardware guy -- if it flakes off then I'll repaint it with a high-temp paint..

I've got two of my bands in the electrolysis bath as we speak.. Not doing much -- I'll be checking my sacrificial anode when I get home -- I haven't been cleaning it between uses and am wondering if the build-up of rust on the exterior is causing it to work sub-par. I'll probably use a grinder to clean it up real well and see if that improves the crud removal process. At least it doesn't cost much of anything to experiment around (aside from time)..
 
You could have a short Woo ring made. 2 rings with riser bars to lift the grate. The top ring can be made larger or smaller diameter than the bottom. This would allow you to use different grates that are available.

Ty
 
Mayday --

The paint was not specifically rated for high-temps.. In fact, I saw NOTHING on the Krylon page for the product indicating that it would or would not withstand any sort of heat usage.. Only time will tell.. Like I told the ACE hardware guy -- if it flakes off then I'll repaint it with a high-temp paint..

I've got two of my bands in the electrolysis bath as we speak.. Not doing much -- I'll be checking my sacrificial anode when I get home -- I haven't been cleaning it between uses and am wondering if the build-up of rust on the exterior is causing it to work sub-par. I'll probably use a grinder to clean it up real well and see if that improves the crud removal process. At least it doesn't cost much of anything to experiment around (aside from time)..

The hi-temp paint's already rubbed off on Humpty's black metal handle. Probably because I used a cotton kitchen glove to lift it when the paint was hot and tacky before it cured. Haven't gotten around to putting a wooden handle on the metal yet... but will soon. The rest of the hi-temp black seems ok.

Adding more laundry soda and cleaning the electrodes could probably rejuvenate the electrolysis. If you've d-rusted a lot, a fresh solution might be the way to go. Am waiting to see how your grill turns out before I start playing with wires.

Was also thinking it might be worth trying to rescue the rusty cooking grate by using the same principle for Stripping Rusty Or Rancid Dutch Ovens, then re-seasoning.

My neighbour didn't think the rusty grate was an issue. "No big deal - just cook on it," he says. I don't know... looks kind of cruddy to me... :icon_bugeyed
 
May--

I've been putting off the de-rusting of the hinge assembly with the wood handles.. Ideally the wood handles are in poor shape but I don't think putting them in a bath of electrolyte solution will help them any.. Probably wouldn't hurt much more though.. I'm hoping to find a nice (and appealing) way to create new wood handles w/o destroying the hinge assembly during disassembly/reassembly.

As for the electrolysis -- I'm using a clean solution that I created a few days ago -- I'm sure it's got to be that my anode is too rusty -- the grime ring around the anode is very small (perhaps 2-3" tops) instead of consuming the entire water surface like in earlier photos. I'll look at that tonight.

I did pull my de-rusted grill out several days ago and found that putting it in the closed bag with a cup of ammonia did virtually nothing other than be stinky.. I ended up using a scotchbrite pad on it (which was destroyed afterwards) and it got some more crap off.. The sides of the grill turned out not too bad but the cooking surface wasn't that appetizing.. However, I've gotten quite good at seasoning cast iron & woks over the past week so I guess I could just try using it and see what happens..
 
In regards to your comment about following the dutch oven cleaning & reseasoning.. I can do that in my larger Kamado and run it up to pizza temps (~900-1000 degrees) and char off the crap.. Works great to get the grease off the grills..
 
Back
Top