• working on DNS.. links may break temporarily.

DIY Reverse Flow Cinderblock pit

sleebus.jones

is Blowin Smoke!
Joined
Sep 12, 2016
Messages
1,141
Reaction score
1,949
Points
0
Age
54
Location
Fulshear, TX
Y'all may remember the cinderblock pit I built a week or so ago in this thread

Well. I'm back with a new and improved version! Some quibbles with the last one:

  • Firebox is too small, requiring frequent tending
  • Small size makes it hard to load...gotta get down on your hands and knees
  • Larger firebox means the inlet has to move up, which will lead to...
  • The pit getting a fair bit hotter where the firebox inlet is
  • Inlet to the pit is oversized for the firebox per a BBQ pit calc page

So. We all know the solution to this: A bigger firebox and Reverse flow! But how do you do it? Well, it's actually pretty easy.

I had to tear the whole pit down, because I had to change the first course. Originally, I had the fire entrance to the pit on the first course. I want it now on the second, so to keep the proper stagger, I had to reset all the blocks. This is why no mortar is good!

CQnhskel.jpg


Now you can see the inlet placement with the second course

trQYlRcl.jpg


I upgraded to 3/8" rebar for supporting the plate...a good suggestion from a fellow brethren here. This is where the reverse flow plate will sit.

kv6RjEtl.jpg


Required more aggressive cutting with the masonry blade to get the rebar to fit.

c5uDBdkl.jpg


Ok, reverse flow plate is in place, now to cut slots for the rebar to support the grate.

3l6vdlgl.jpg


There we go. So, you can see the reverse flow plate and the grate here. Slot is about 4" or so at the other end. The area of the slot matches the area of the inlet to the pit from the firebox. With the bigger firebox, now the inlet to the pit is the right ratio so it draws properly.

kwN2hTTl.jpg


Another view of the slot

1OLw1dfl.jpg


Oh yes, sweet, sweet room to make a decent fire.

PW6LNK4l.jpg


All back together. I need to trim the steel plate I'm using to control the inlet air. Looks like I'm gonna need to get handy and learn how to use a torch.

oIzxBybl.jpg


So today, I didn't do any cooking. I just took it up to 400° to season the reverse flow plate...I had wiped it down with lacquer thinner to remove any stray hydrocarbons and then coated in peanut oil to season. The temp management seemed much more well behaved. The previous version would really swing pretty hard when you added a split.

Future improvements might be a stack with a damper, but what I've got now works pretty well.
 
Last edited:
I love this build! Just goes to show you don't need to weld or buy a $3000 pit. Can't wait to see how you continue to improve this with each variation. Once you're done you should document the plans so others could follow it!

Now where's the food pron!!!
 
I love this build! Just goes to show you don't need to weld or buy a $3000 pit. Can't wait to see how you continue to improve this with each variation. Once you're done you should document the plans so others could follow it!

Now where's the food pron!!!

That was the idea...a high performance pit that just about anyone could throw together pretty much anywhere in the world.

So, materials for the current build are:

52 8x8x16 cinderblocks. Lowes has them for $0.66, so $34.32
Custom cut 1/8" steel plate top $50
Custom cut expanded metal grate $35
Custom cut reverse flow plate $36
20' of 3/8 rebar $8

So ~$125 for the "build". You'll need a masonry blade for a circular saw to cut the slots in the cinderblocks...nothing else works as well. I realize the steel plate parts can be somewhat difficult to source, but a little research should find some sources for you. I'm lucky to have a BBQ pit fabricator about 10 miles away. The top I have is probably overkill, I'm sure there's cheaper ways to cover it up.

Food pr0n coming in a day or so!!
 
Would anything be better than showing up at a competition with the back of the truck full of cinder blocks on thursday afternoon. 45 mins later you have built an amazing reverse flow pit.

Now we just need to drill some holes for the TelTru Thermo and some spray paint to get the team name on the outside. :)

i LOVE this build and it would ALMOST be worth the a$$ chewing i would get from the wife to build this in the back yard.

rb
 
Would anything be better than showing up at a competition with the back of the truck full of cinder blocks on thursday afternoon. 45 mins later you have built an amazing reverse flow pit.

That would be insane. Imagine beating some of those dude with their $6000.00 smokers..plus you'd have a lot of onlookers for sure.....:biggrin1::biggrin1:
 
For the inlet you could just mount a large ball valve on that sheet metal. Then you could adjust airflow at a granular level. Still noodling the exhaust....:confused:
 
Great build!!! Where's the chimney??

For right now, it's accomplished by sliding the plate on the top back to create a slot. Cheap & cheerful approach. I had a shot of the top in the other post, but it looks like this:

lBVC9hzl.jpg


I am thinking about putting a stack on it, but that would require a 4" hole in the plate, a stack (duh!) and a damper. Maybe in the future when my torch skills develop!

Would anything be better than showing up at a competition with the back of the truck full of cinder blocks on thursday afternoon. 45 mins later you have built an amazing reverse flow pit.

Now we just need to drill some holes for the TelTru Thermo and some spray paint to get the team name on the outside. :)

i LOVE this build and it would ALMOST be worth the a$$ chewing i would get from the wife to build this in the back yard.

rb

Ha! I'd love to see that! That would be so awesome. It's definitely doable too, but it's gonna be ~1,500 lbs of blocks! Might need to split the load. Honestly, it doesn't look too bad once it's all together. Some paint on the outside would go a long way to making it look acceptable.

For a thermo, I drilled a hole in the top, and then I just drop a thermocouple down there. Since the only access to the inside of the pit is by just simply lifting the top off, I'd be concerned about breaking the probe part of the thermo off when you set it down, unless you were really careful. Also, with the thermocouple, I can feed enough wire to get it to hang right at cook level over the meat.


BTW, I have a great idea for a team name: "Some Assembly Required" :becky:


That would be insane. Imagine beating some of those dude with their $6000.00 smokers..plus you'd have a lot of onlookers for sure.....:biggrin1::biggrin1:

There'd be a lot of :shocked: and :crazy: and then :doh: when they taste what comes off of it. I'm doing the first cook today on the new configuration, but if it's better than the previous configuration (which cooked awesome BTW) it's gonna be downright silly.

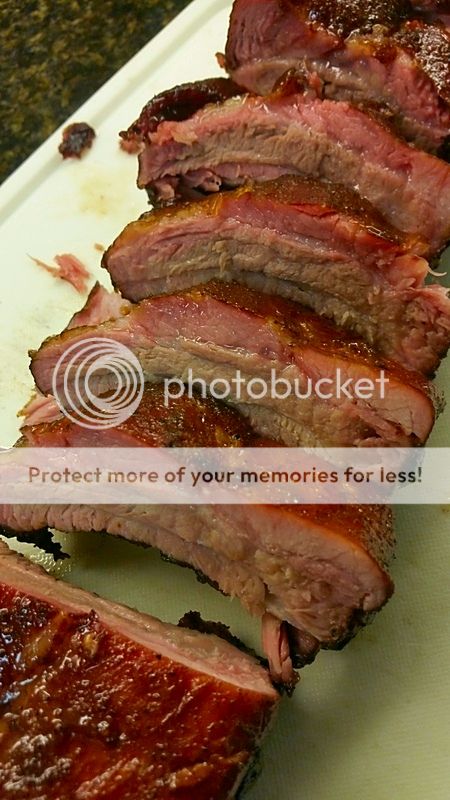
This was the results from the conventional flow configuration:


Those were done with rub only, no wrapping, cooked straight through at ~275°. The were freakin' delicious.

For the inlet you could just mount a large ball valve on that sheet metal. Then you could adjust airflow at a granular level. Still noodling the exhaust....:confused:

Well, this thing does love air. For the inlet, calcs are recommending a 19 SqIn opening. That would be a HUGE ball valve. For an intake, I really like this design:

hLyLfA8l.jpg


Cheap and gives you micrometer control over the intake, and you can open it way up with no restrictions. Also, remember these are just stacked blocks; the firebox is naturally leaky.

Calculated dimensions for the stack is 4" x 25". The reverse flow sheet is 15.5" x 28". I may have some further tips for reducing the throat size, calcs now say it's 27% oversize, but I have ideas for reducing that. I'm going to probably draw this thing up in SketchUp so everyone can see how it goes together.

Cool thing is that it's scalable. You can make it as big as you need. Blocks are cheap! :thumb:
 
Last edited:
That would be insane. Imagine beating some of those dude with their $6000.00 smokers..plus you'd have a lot of onlookers for sure.....:biggrin1::biggrin1:

Season 2, Episode 6 of BBQ Pitmasters had the teams doing a whole hog on cinder block pits. It aired back in 2010. Fun to watch, really leveled the playing field.
 
Back
Top