donmiller
Knows what a fatty is.
I have nearly completed a "mini ugly drum smoker" or MUDS.
I walked into an ACE hardware store and saw some large lard cans, and that got the wheels turning. Those cans have very thin walls, however, and I was afraid that they would not take the heat. For that reason, I am experimenting with a komodo-esque clay pot firebox.
I can fire this up as soon as tomorrow for testing, but I was wondering if I should paint it first and wait. What do you guys think?
Pictures follow:
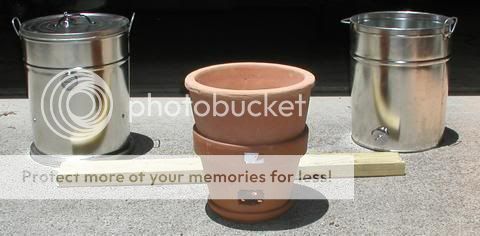
Here are the basic components:

The lard can on the left is the food chamber. It has holes drilled in the bottom to allow smoke and heat to enter from the fire chamber (the can on the right). The food chamber is permantly attached to the lid for the fire chamber, but the holes in the fire chamber lid are misaligned by design from those in the food chamber bottom so that the direct radiant heat from the coals does not get directly to the food. The design has an inherent baffle.
If the description above is not clear, consider that the bottom of the lard can is raised about 1/4" due to the seam around the outside. When this can is fastened to the lid below, there is a 1/4 inch dead-space or plenum formed. We must cut holes in both the top (bottom of food chamber can) and bottom (lid for fire chamber) surfaces of the plenum for smoke and heat to get through, but we mis-align these holes on purpose so that the smoke must bend around to get through. So, the infrared radiation from the fire is blocked. Cooking is indirect.
The following shows the stacking of the clay elements. The firebox is placed on top of a clay ash chamber. The square hole in the side of the ash chamber will be placed in the fire chamber to align with the intake hole (intake air damper):
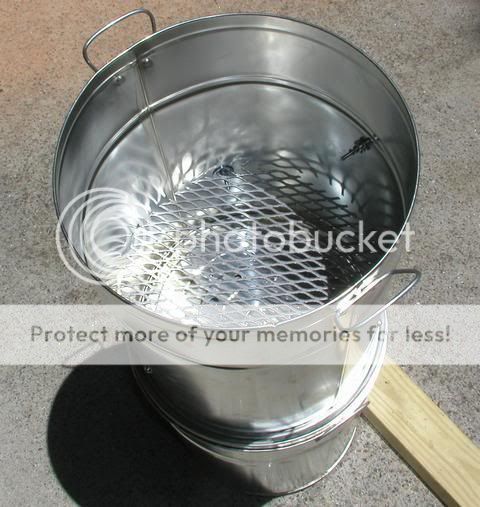
Here is a view looking into the fire chamber (at the firebox) from above:

Note that if we remove the grid from the food chamber and install it directly over the firebox, we have converted to a grill:

The shot above also shows the bottom magnetic slide damper. There is a similar damper on the top:
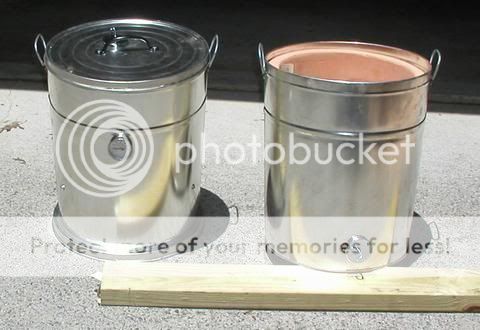
Here is a view of the two main components. Note that the left-hand assembly (food chamber) has a lard-can lid permanantly attached to it's bottom. The smoke plenum is between the lid and the bottom of the food chamber can:
Here is a top view showing the cooking grid. If you look closely, you might be able to see the smoke holes in the bottom surface of the can:
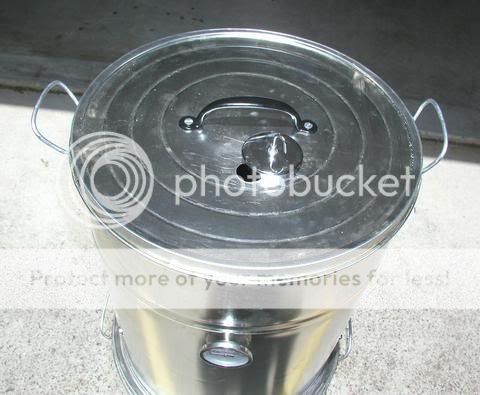
...and finally the completed cooker:
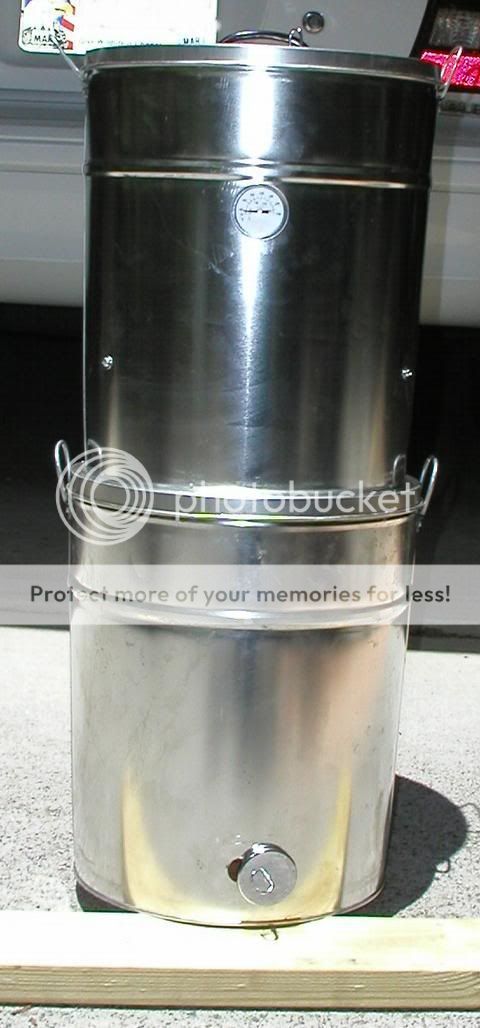
In operation, the handles on the lower lard can will be used to move the entire cooker. The side handles on the upper lard can, when lifted, separate the food chamber from the firebox. This makes re-fueling possible (but I hope that it will not be necessary during a cook). The top handle, of course, provides access to the contents of the food chamber.
This has been a fun build, and I am tempted to give this unit a test run tomorrow. There is a chance that the thin walls of these cans will not be up to the task, even with the ceramic firebox, so I would not advise anyone to try to follow in my footsteps until I have done some real testing with this cooker. Sizing of intake and outlet ports was done by pure SWAG. I may need to tune things later...
I've never built a UDS, but I assume that I will want to spray the cook chamber with oil before the first firing to build up a patina and season the inside. I'll be looking for whatever advice you guys can throw me before first firing.
Thanks,
Don
I walked into an ACE hardware store and saw some large lard cans, and that got the wheels turning. Those cans have very thin walls, however, and I was afraid that they would not take the heat. For that reason, I am experimenting with a komodo-esque clay pot firebox.
I can fire this up as soon as tomorrow for testing, but I was wondering if I should paint it first and wait. What do you guys think?
Pictures follow:
Here are the basic components:
The lard can on the left is the food chamber. It has holes drilled in the bottom to allow smoke and heat to enter from the fire chamber (the can on the right). The food chamber is permantly attached to the lid for the fire chamber, but the holes in the fire chamber lid are misaligned by design from those in the food chamber bottom so that the direct radiant heat from the coals does not get directly to the food. The design has an inherent baffle.
If the description above is not clear, consider that the bottom of the lard can is raised about 1/4" due to the seam around the outside. When this can is fastened to the lid below, there is a 1/4 inch dead-space or plenum formed. We must cut holes in both the top (bottom of food chamber can) and bottom (lid for fire chamber) surfaces of the plenum for smoke and heat to get through, but we mis-align these holes on purpose so that the smoke must bend around to get through. So, the infrared radiation from the fire is blocked. Cooking is indirect.
The following shows the stacking of the clay elements. The firebox is placed on top of a clay ash chamber. The square hole in the side of the ash chamber will be placed in the fire chamber to align with the intake hole (intake air damper):
Here is a view looking into the fire chamber (at the firebox) from above:
Note that if we remove the grid from the food chamber and install it directly over the firebox, we have converted to a grill:
The shot above also shows the bottom magnetic slide damper. There is a similar damper on the top:
Here is a view of the two main components. Note that the left-hand assembly (food chamber) has a lard-can lid permanantly attached to it's bottom. The smoke plenum is between the lid and the bottom of the food chamber can:
Here is a top view showing the cooking grid. If you look closely, you might be able to see the smoke holes in the bottom surface of the can:
...and finally the completed cooker:
In operation, the handles on the lower lard can will be used to move the entire cooker. The side handles on the upper lard can, when lifted, separate the food chamber from the firebox. This makes re-fueling possible (but I hope that it will not be necessary during a cook). The top handle, of course, provides access to the contents of the food chamber.
This has been a fun build, and I am tempted to give this unit a test run tomorrow. There is a chance that the thin walls of these cans will not be up to the task, even with the ceramic firebox, so I would not advise anyone to try to follow in my footsteps until I have done some real testing with this cooker. Sizing of intake and outlet ports was done by pure SWAG. I may need to tune things later...
I've never built a UDS, but I assume that I will want to spray the cook chamber with oil before the first firing to build up a patina and season the inside. I'll be looking for whatever advice you guys can throw me before first firing.
Thanks,
Don

")
